In this post I give a step by step explanation for creating a form from scratch (with a customized table) in Dynamics 365 with form pattern “Detail master” based on a fictive example.
We create a form based on a customized table. We are able to add attachments for this table and attachments of the Document TypeGroup ‘Note’ ( see table DocuType field TypeGroup) and ‘File’ are displayed in the form as well.
Technically we create a form with a Detail master pattern with 3 grids. Each grid is based on a separate datasource. The first datasource is based on the new customized table (‘FoxServiceOrder’). The other two datasources are both based on table ‘DocuRef’, but in our form we give them different names:
DocuRefNotes for the datasource which should diplay only DocuRef records of DocuType ‘Note’,
DocuRefAttachment for records of DocuType ‘File’.
The customized table FoxServiceOrder does not have a relation with the DocuRef table. This is what we should customize with coding, without adding table relations.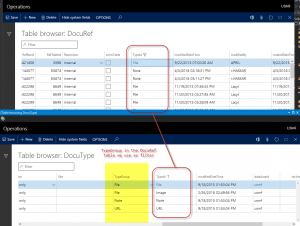
Characteristics of a form with a Detail master pattern is that in the design we see two parts.
- Tab page for Details information
- Grid , which shows a list.
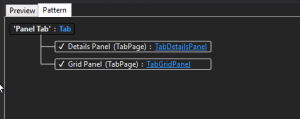
The Grid and Details web page so as we can see it in the form design.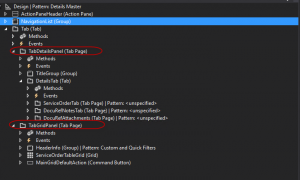
When opening the form it opens by default in the Grid view.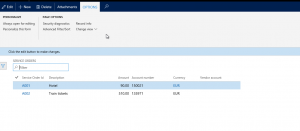
When we double click of one of the records key field then the Details page opens: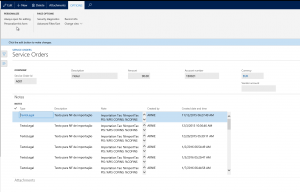
Here are the steps:
Step 1: Create the table FoxServiceorderTable.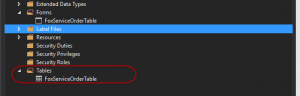

Step 2. We create the form. When the form is created, we navigate to the design. Here we add pattern by right mouse click, Apply pattern, we select option “Details Master”.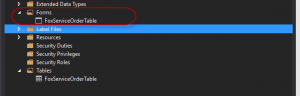
Step 3),
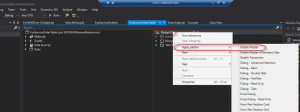
In our form we should now create a button so that we can attach documents which are inserted correctly (so that the correct RefCompany, RefRecId and RefTableId fields are inserted in the DocuRef Table. ![]()
We need to copy the mibDocView MenuItem button from the CustTable and paste in in our form.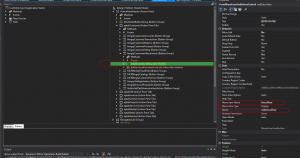
When clicking the button the form, in which we can add the attachment, opens.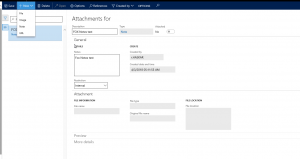
Step 4) Attach the datasources. We won’t join any of the Datasources.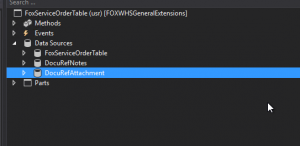
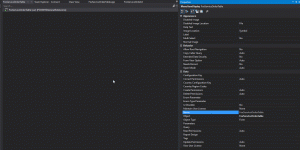
Step 5) Create (or generatCU>12) all mandatory controls (see screenshot).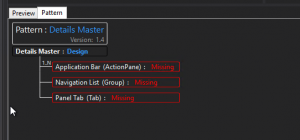
Controls of the Application Bar: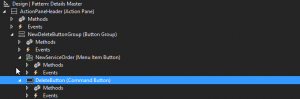
Controls of the Navigation List: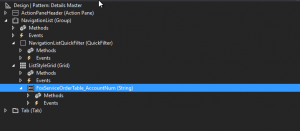
Controls of the Panel tab:
Step 6) Now we can add the query in the init method of the form. The query shows the logic to filtering both DocuRef datasources of our form.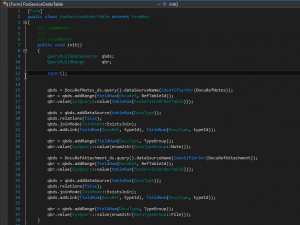
In the execute query of each of the DocuRef data sources we need to add the following code to refresh query in case we select another record (the trick is the ‘FindOrCreateRange’ statement) :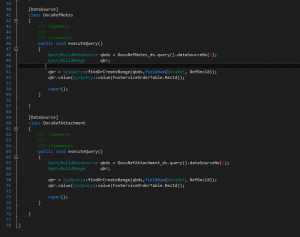
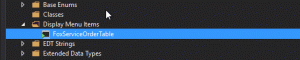
In order to test the form, we have to create a menu item, which is linked to our form. In our example, which is also best practice we give the display menu item the same name as the form.
Once we have form’s menu item available, we simply can open our form by entering the menu item name in the url after the ‘&mi=’ characters in the url.
So if you have a contoso environment, the full url of our form will be:
https://usnconeboxax1aos.cloud.onebox.dynamics.com/?cmp=usmf&mi=FoxServiceOrdertable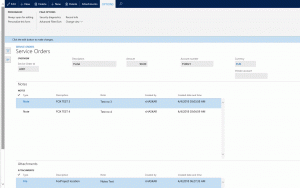
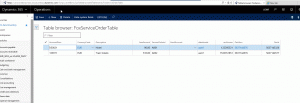
Btw web browser also supports table browser (SysTableBrowser) function . To open the table FoxServiceOrder table, simply use following syntax after the ‘&mi=’ : Systablebrowser&Tablename=FoxServiceOrder