Security basics explained
We create a fictive role from scratch and demonstrate the basic steps for implementation and assigning the new role to a user. Also relation between following security objects is explained:
- Security Privilege
- Security Duties
- Security Roles
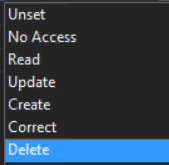
First we take a look to the Security Privileges. Security privilege object is the cornerstone of the Security Role. Here we define the permission level to a certain object for example a form. In the screenshot below we see the available permission levels. Read is the lowest level and Delete is the highest.
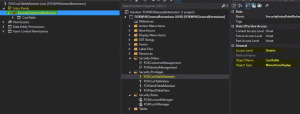
In the screenshot below is demonstrated how to link object in this case.
According best practices we use suffix ‘Maintain’ for the object with the Delete permission and View for the object with the lowest.
When we open Security Privilege we see the EntryPoint and the SecurityEndpointReference. In the properties of the SecurityEndpointReference we can configure security level and the menu item for which this level applies.
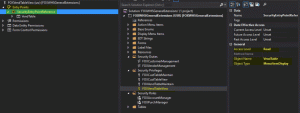
With the the following two Security permissions we will compose a new role for a user: The CustTableMaintain and teh VendTableView. The result is that the user who get this role will get ‘Delete’ permission for the CustTable, and ‘Read’ permission for the VendTable. If the user has no other roles with higher permission level, it means that user is only had read permission for the VendTable.
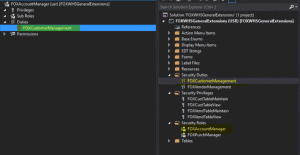
Next step is to link these privileges to a Security Duty. With drag and draw we can add the Security Privileges to the Security Duty. We can say that a Security Duty is a collection of privileges.
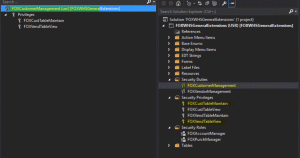
Next step is assign the Security Duty to a Security Role. The system create a new record in the SecurityRole table (see system documentation | tables). Now we can assign the role to (a) user(s).
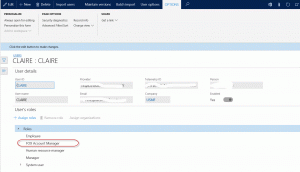
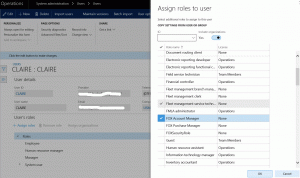
To assign the role to a user, go to System Administration | users and select the user. In section ‘User Roles’ select ‘assign roles’. A pop up window with the roles appears. Make your selection and click the OK button.
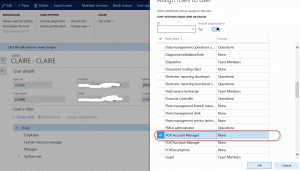
Now the role is assigned.