In this thread I will demonstrate how we can create a counting journal header record in Dynamics 365 via PowerApps. In a next threat(s) I will continue with the counting journal lines. You can start Power apps by using url make.powerapps.com and log in with your MS account.
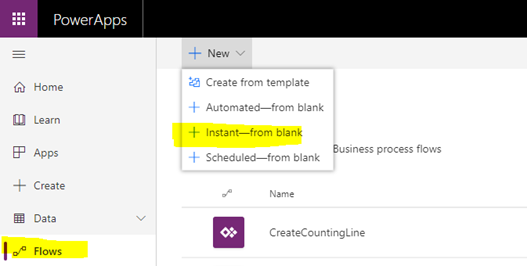
The first step is to create a new flow. In a flow we are able to define the steps of a process, for example the creation of a counting journal header in Dynamics 365 FO. In our case we define the collect parameters from PowerApps and use them to create a new counting journal in Dynamics 365 FO. At the other hand we also can send parameters from Dynamics 365 FO back to PowerApps. Here are the steps to create the flow:
First we create a new flow. Select option “Instant-from blank”.
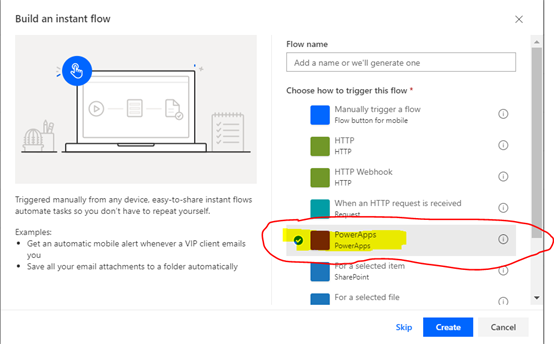
Select PowerApps and click “create” button.
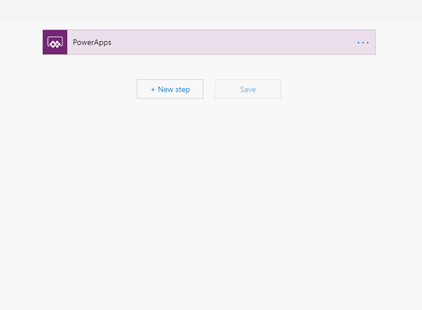
At this stage the flow is not connected yet to a PowerApp. That is what I show yours in the next steps of this thread. We should now define the parameters which we will be send to Dynamic s 365 FO. Actually we see now the following screen:
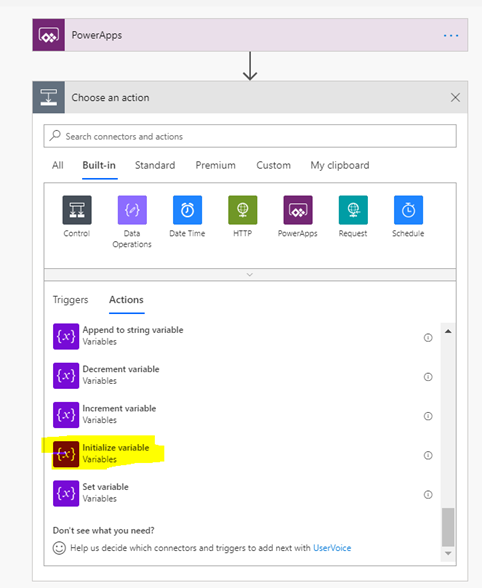
Now we can add the parameters we need. I will add the parameters for the JournalName and DataAreaId. To select a variable set the cursor on the header bar “build-In” tab. Now Scroll down until you see “Initialize variable” as demonstrated in the screenshot:
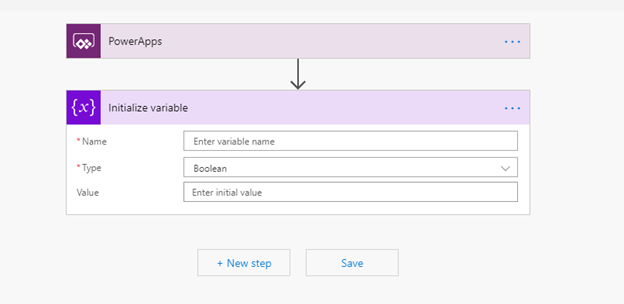
After creation of the Initialize variable you will see something like this:
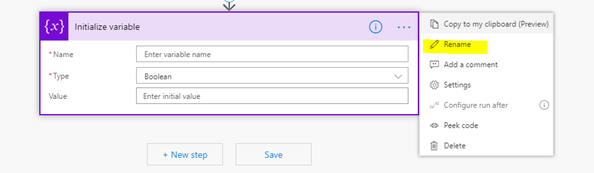
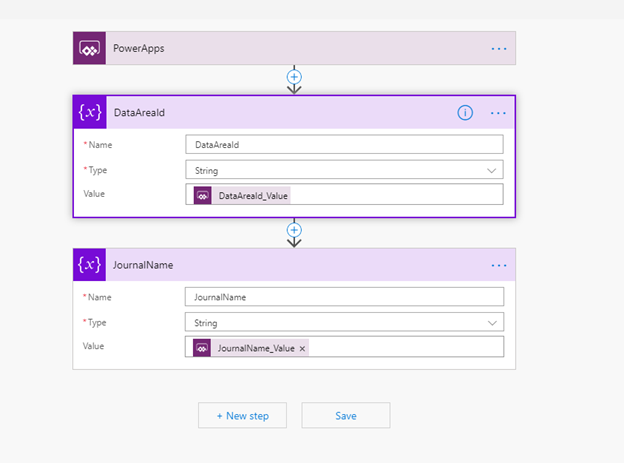
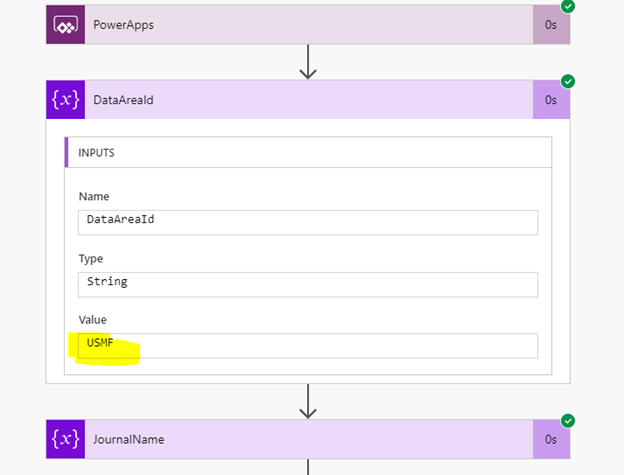
The first parameter we gonna create is the DataAreaId for entering the entity (or country). The first thing to do is to rename initialize variable into something like ‘DataAreaId’. We also have to define the ‘Type’, which is a string.
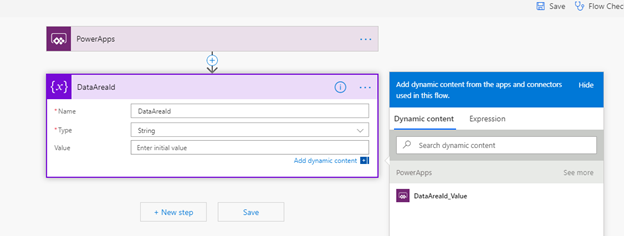
In order to enter a value for your parameter, enter the Value box. A dialog at the right will appear. Here we see a suggestion to select ‘DataAreaId_value’ (if the initialize variable is renamed in DataAreaId). Select this as value. In case you cannot see this value suggestion in list or there is no DataAreaId_Value listed, click ‘See more’ to see another options to choose.
When our parameters are ready we should see the following:
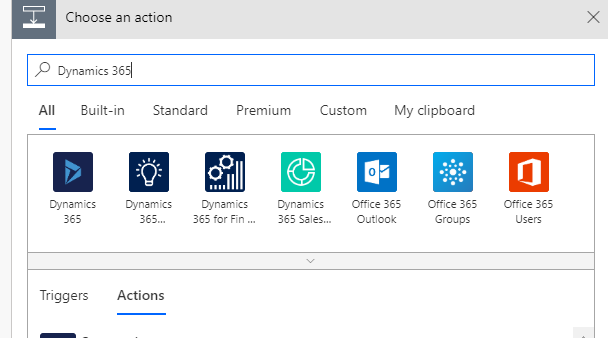
Now we add the Dynamics 365 task the flow supposed to be done. We create a new action via “Choose and action” and select “Dynamics 365 for Fin & Ops”.
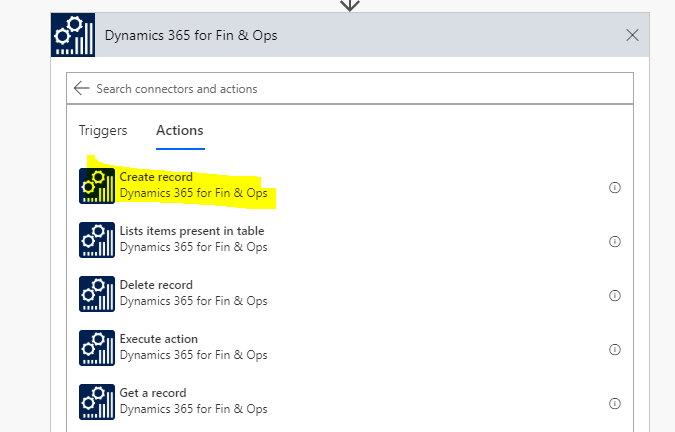
As we would like create a new record in Dynamics 365 FO we choose as action “Create record”.
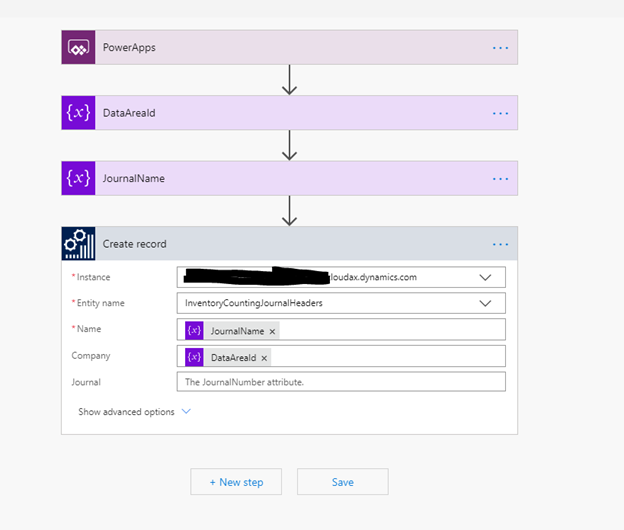
Enter the instance name of your Dynamics 365 FO instance, and the entity name is “InventortCountingJournalHeaders”. We enter JournalName value into the name and the DataAreaId into Company:
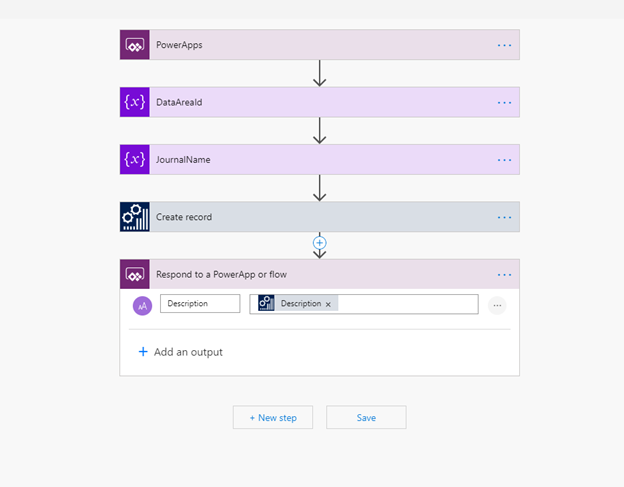
It’s also possible to send data from Dynamics 365 back to PowerApps. To do this we add new task “Respond to PowerApps or flow”. We add a new text field, and link the Dynamics 365 Journal Description to it.
Now we are ready with the flow. Next step is to create the PowerApp and connect it with the flow.
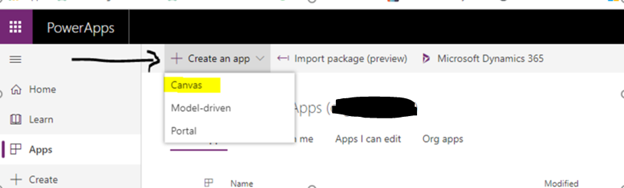
Place the cursor in the first left column of your screen at icon “Apps”, and click header bar option “Create an app”.
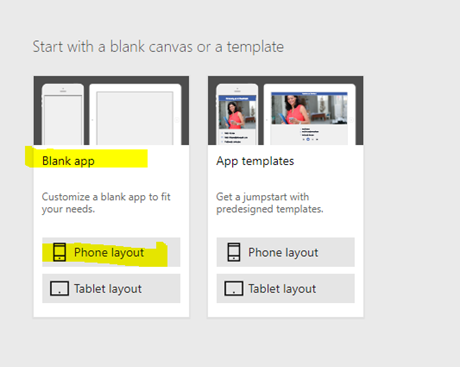
Next step: select “Blank app” and “Phone layout”.
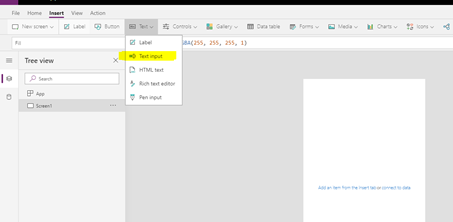
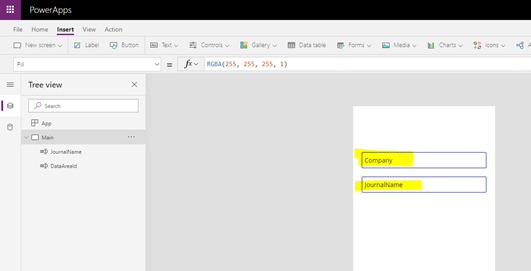
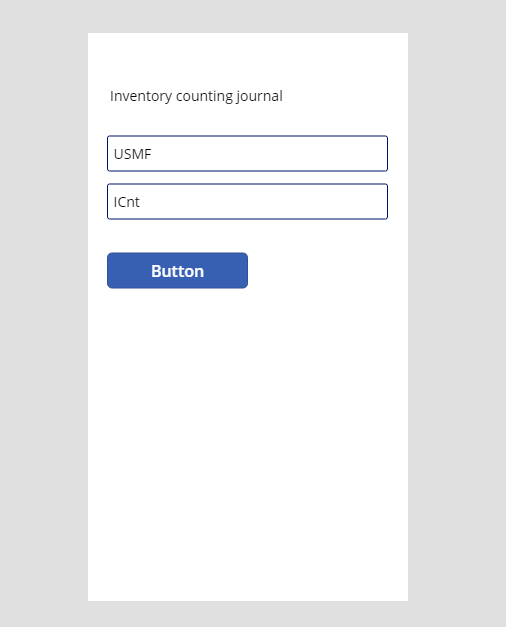
Now we see a blanco canvas for our app. Here we insert a Text Input for both the DataAreaId (company) as the Journalname parameters:
Here we see the parameters we send to the flow:
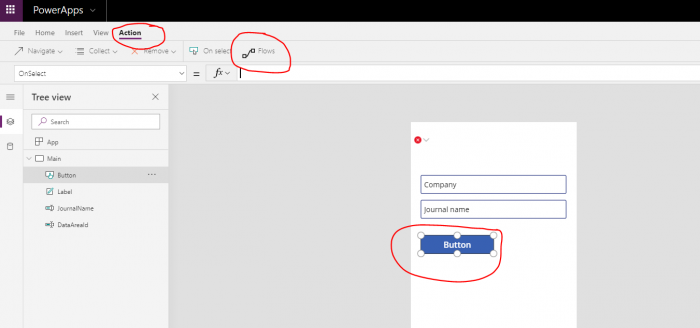
Now we add a button. It is our aim that one click on this button will result in a new counting journal header record in Dynamics 365 FO, so we should connect the flow we created in the previous steps to the logic of the button.
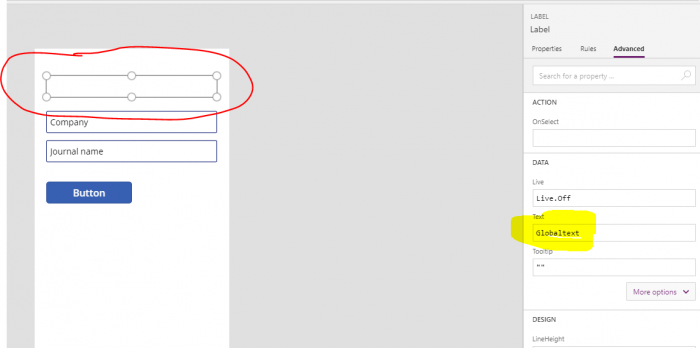
We also create a label (control name is label), to display the value we will receive from the flow.

To connect the flow to the button we have to first mouse click the button. Then click “Action” at the top header and then click “flows” .
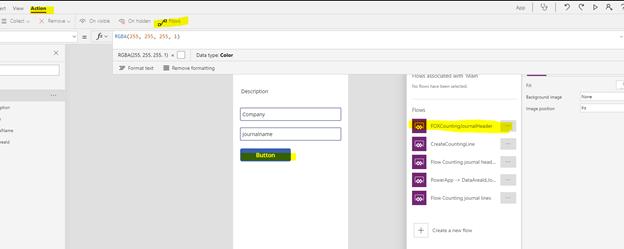
Now we can select our flow from the list.
Once we connect the flow, we get a warning to enter the flow.
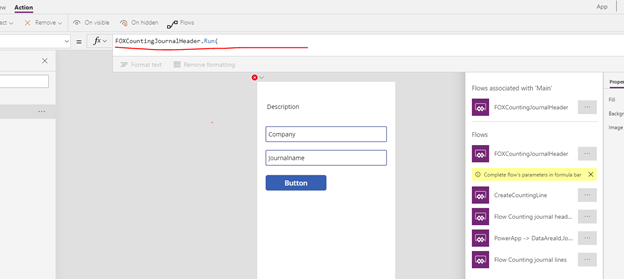
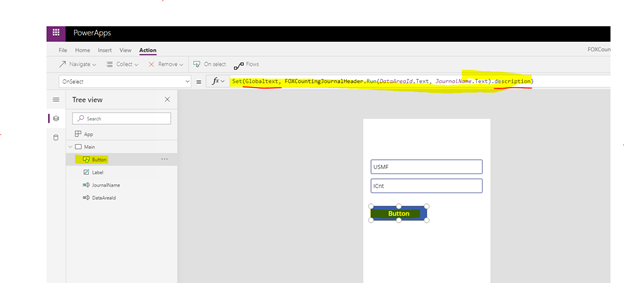
But we not only would like to give parameters to the flow, we also would like to receive the parameter “Description”. Therefore we have to insert the following logic behind the “on-select” event of the button:
Set(Globaltext, FOXCountingJournalHeader.Run(DataAreaId.Text, JournalName.Text).description)
Actually what is happening here is that the “globalText” variable, get it’s value from the “description” parameter which get’s it’s value in return from the flow action “Respond to a PowerApp or flow” (which is the last activity of the flow we created).
In order to display the value of the “globalText” variable, we put the variable name into the “Text” property of the label control.
Now we are ready to test the App. Give a value for the company and the Journalname before run the App. We can run the app by simply ress the ‘ALT’ key and click the Button. When done we see that the label control get the journal description from the flow, which in return get it’s value from the Counting Journal we created in Dynamics 365 FO.
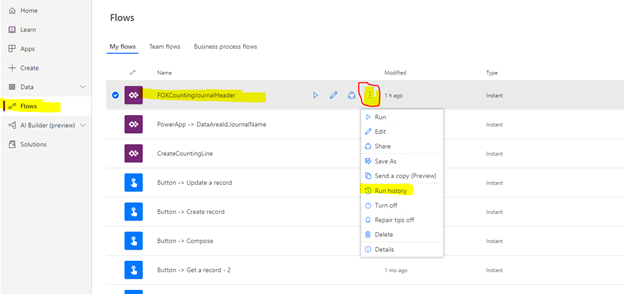
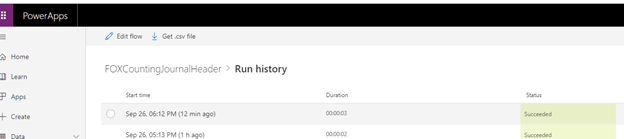
We can check the history of the flow, and we should see that we have run the powerApp. Click the three dots right of the Flow and select “Run history”
If a run is successful we see thatthe status is “Succeded”.
We can open the event to get more detailed information about the run. For example the result for each step in the flow.
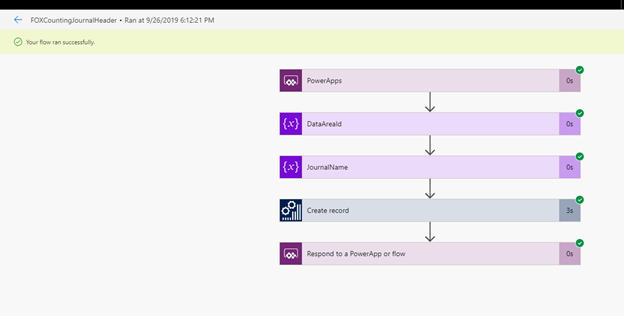
We can open each step to get more detailed information:
If we open the “create record” step, we see the values which were transferred to the Dynamics 365 FO:

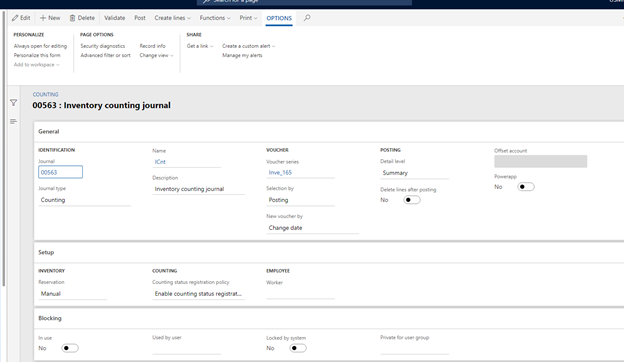
And off course we also should see the new counting header record in Dynamics 365 FO: