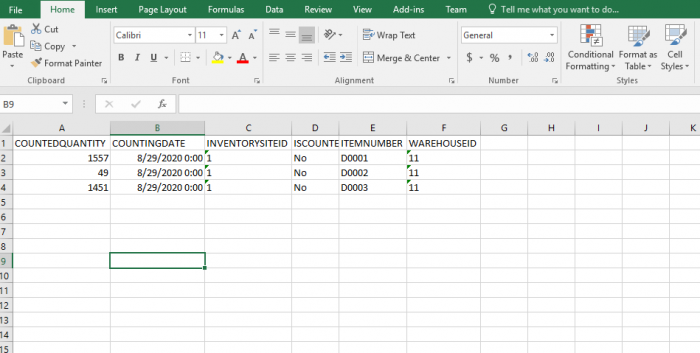
In this article I will demonstrate (in the Contoso environment) how we can build a data entity step by step, which create the journal header automatically based on the below Excel template which doesn’t contains journal info neither line numbers.
There are two solutions we can choose to accomplish this or by creating a Composite DataEntity or by code. In this article I show how we can manage this by X++ code. I choose to make a copy of the standard objects, and make the customizations here.
I make a copy of entity InvententInventoryCountingJournalLineEntity and it’s staging table InventInventoryCountingJournalLineStaging.
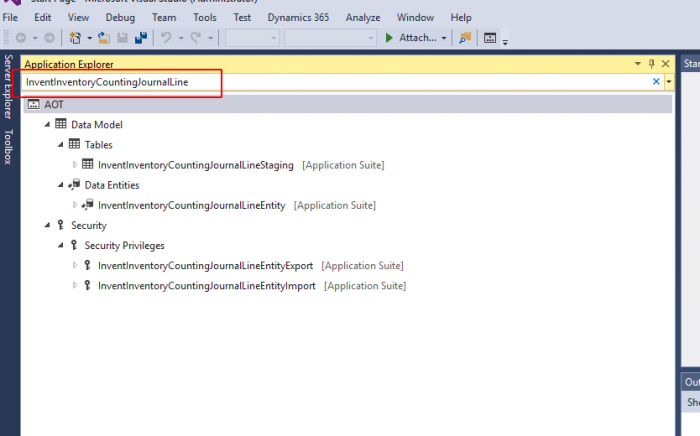
1) Open in visual studio the Application Explorer, and filter on InventInventoryCountingJournalLine. We will see the following search results:
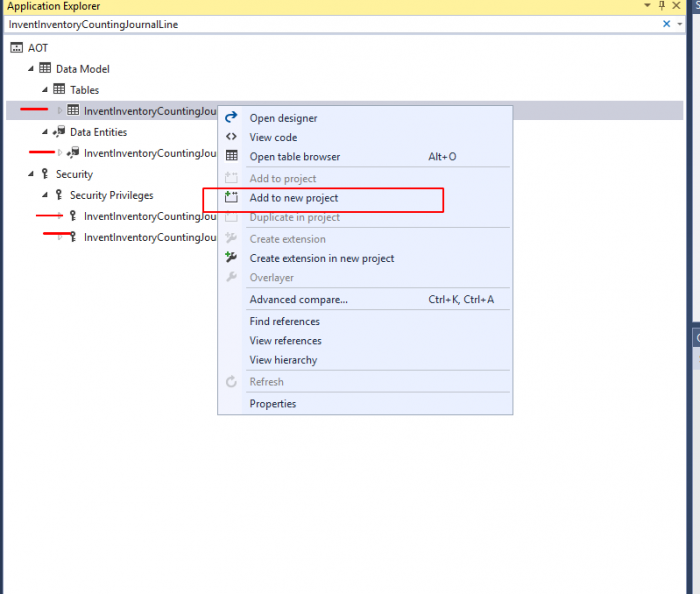
2) To transfer the selected elements to a project do the following: Select table InventInventoryCountingJournalLineStaging, and do a right mouse click. Select option AddToNewProject. Repeat this step for the entity and the Security Privileges as well.
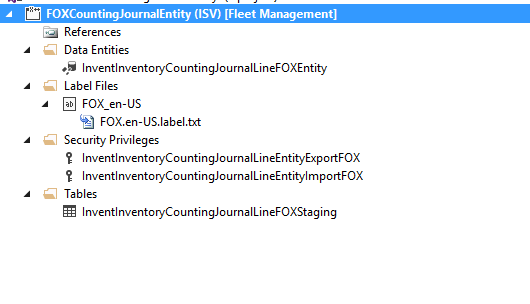
3) Now we have a project with the selected objects. Rename the objects and if not available yet, add a label file. In this example I have rename the entity to InventInventoryJournalLineFOXEntity and the staging table to InventInventoryCountingJournalLineFOXStaging
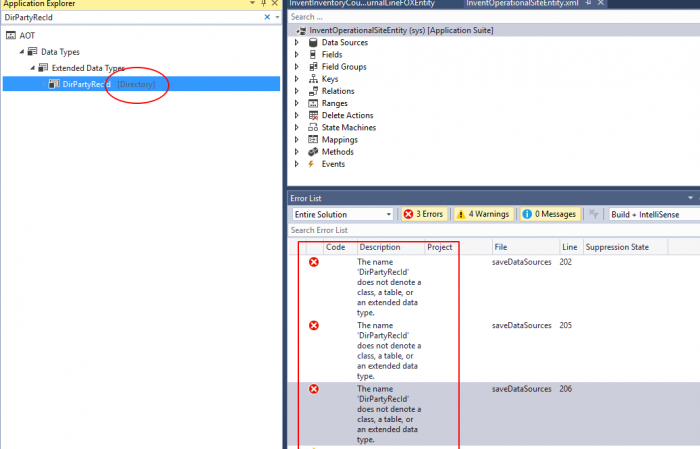
4) To avoid compilation errors you can see in the screenshot below, we have to update model parameters to add the appropriate packages to the model.
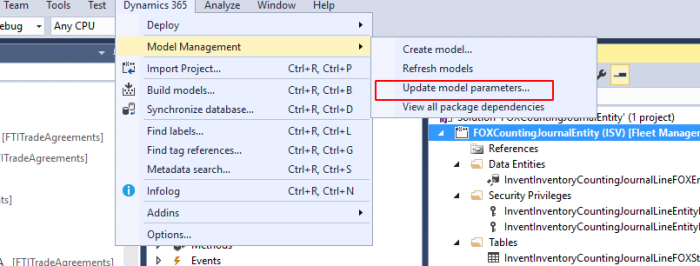
5) Go to Update model parameters:
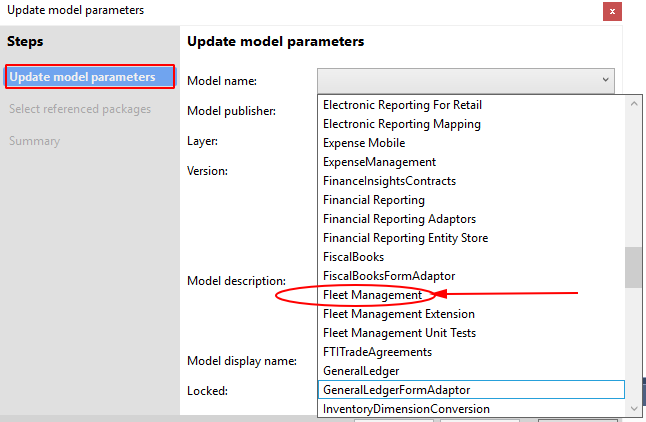
6) Select option “Update model parameters” and select the model of your project. In this example we choose for Fleet Management.
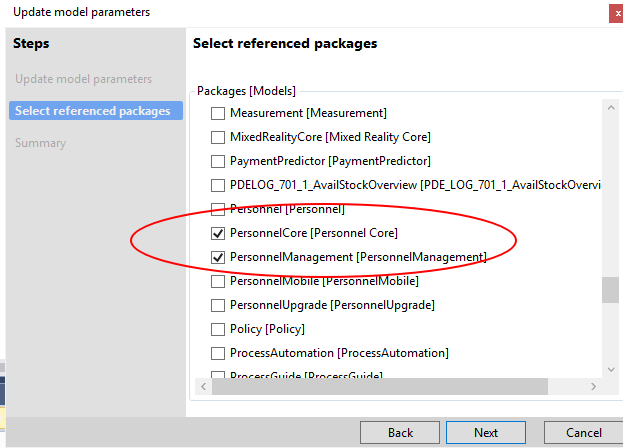
7) In Select referenced packages be sure that the following packages are ticked (apart from ApplicationFoundation, -Platform and -Suite):
Dimensions
Directory
FiscalBooks
Ledger
PersonalCore
PersonalManagement
SourceDocumentationTypes
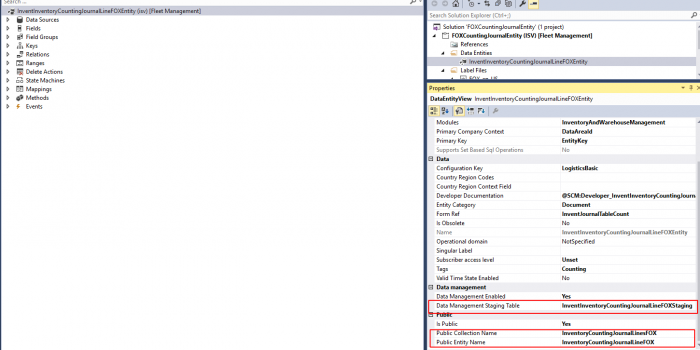
8) Make the following changes in the data entity properties:
* label
* Data management Staging Table → staging table we created
* Public Collection Name → a unique name
* Public Entity Name → a unique name
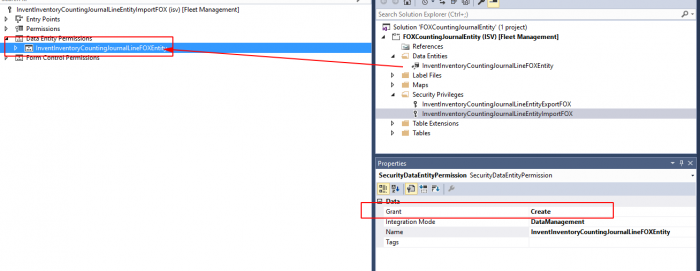
9) Security privileges (one for export and import)
* Unique label
* Drag and draw the Dataentity into Data Entity Permission of the Security Privilege
set Grant to “Read” for the Export version and “Create” for the import.
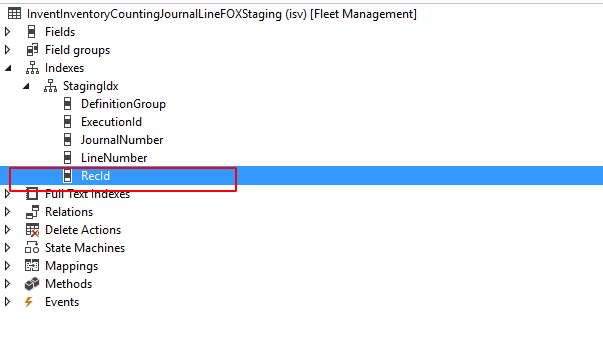
10) Change in staging table. Because Journalnumber and Linenumber are empty at moment of import, and DIXF validations are already triggered before we assign values to them, DIXF class will raise error which prevent the import. To avoid this, we will extend (in the staging table) the StagingIdx with the field RecId.
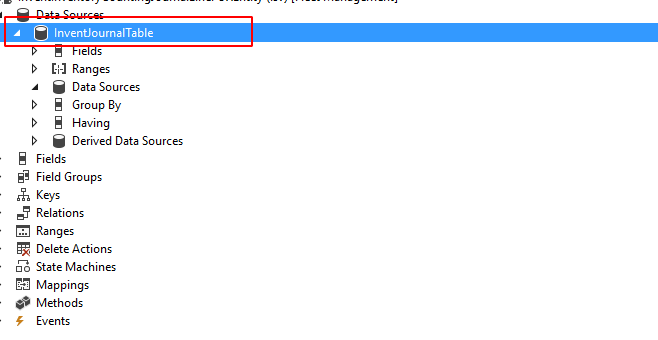
11) Change DataEntity. When opening entity InventInventoryCountingJournalLineFOXEntity, we see that there is no datasource available for the journal header (InventJournalTable). It’s not a good idea to insert this datasource as child for InventJournalTrans as we cannot use parts of standard logic anymore so instead,InventJournalTable should be the parent of the InventJournalTrans.
As we cannot insert parent, we have to remove the InventJournalTrans datasource first before we can add a InventJournalTable first and InventJournalTrans again, but as a child from InventJournalTable.
12) Remove datasource InventJournalTrans. Instead add new datasource InventJournalTable.
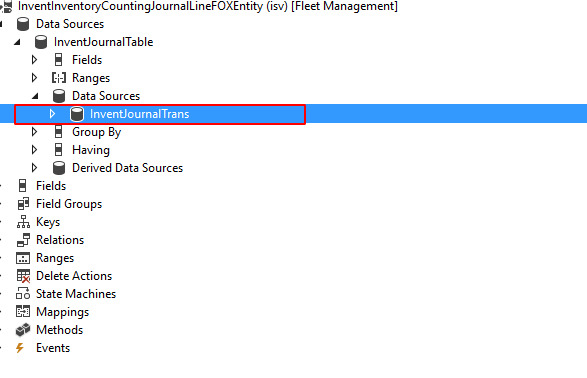
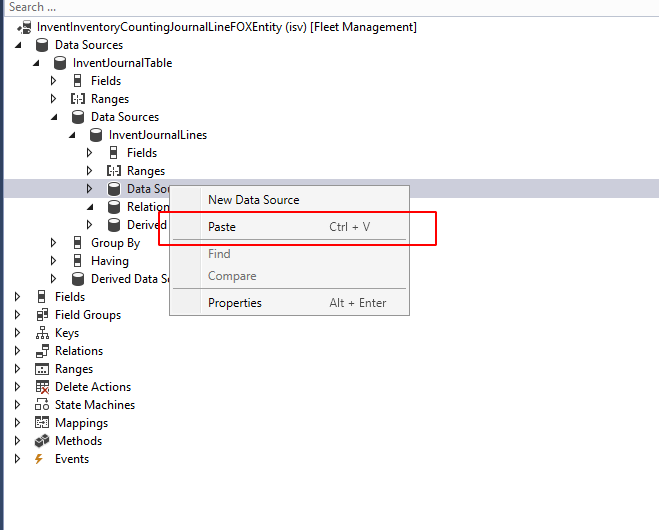
13) Insert the dataSource InventJournalTrans under the DataSource node of the InventJournalTable.
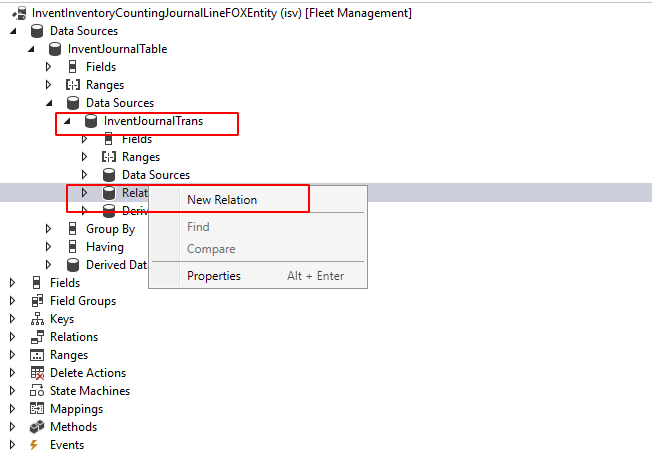
14) We need to create a relation between the datassources InventJournalTrans and InventJournalTable Under InventJournal trans node select Relations and Add New relation:
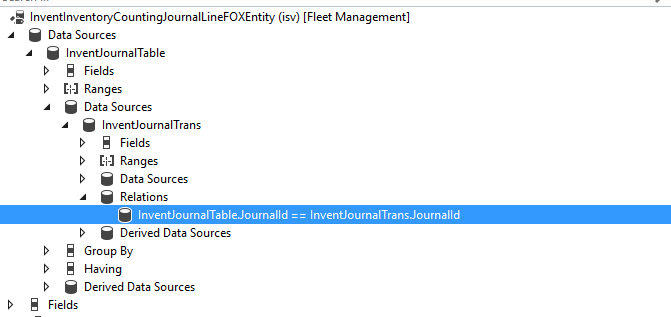
15) Enter JournalId for both field and related field in the datasource parameters. Join datasource is the InventJournalTable datasource.
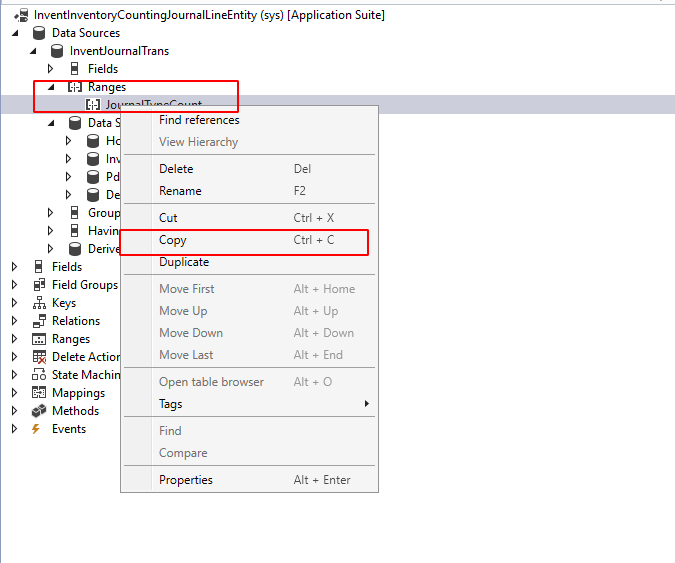
16) Now go to entity InventInventoryCountingJournalLine. Select the datasource InventJournalTrans. open the node and open Ranges JournalTypeCount. copy and paste it in the same datasource of the InventInventoryCountingJournalLineFOXEntity entity:
17) Do the same also for all child data sources of the InventJournalTrans data source, as shown in below screenshot:
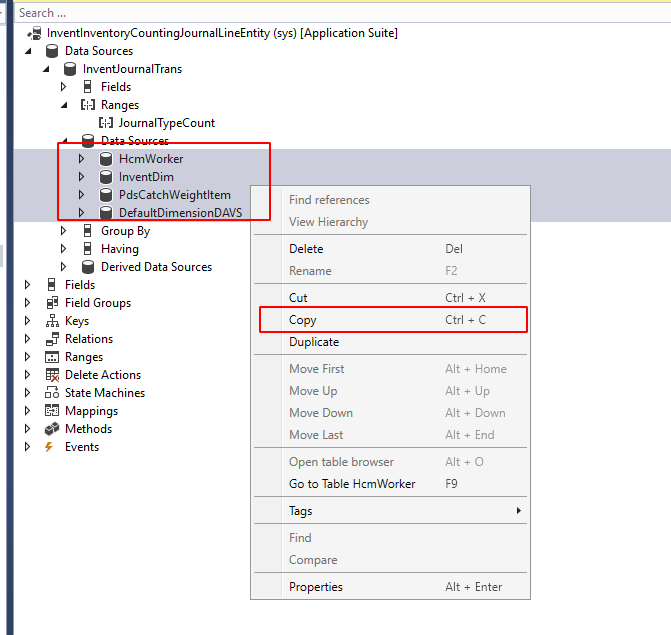
and paste it in the DataSource node under the InventJournalLines datasource in the InventInventoryCountingJournalLineFOXEntity entity.
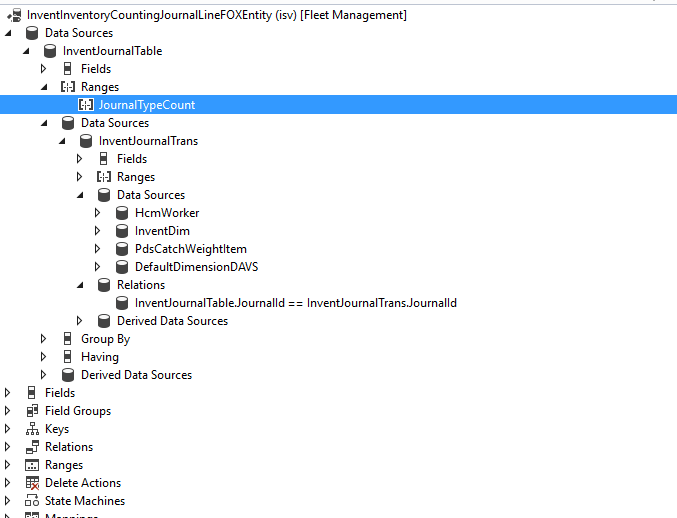
18) InventInventoryCountingJournalLineFOXEntity looks now like this:
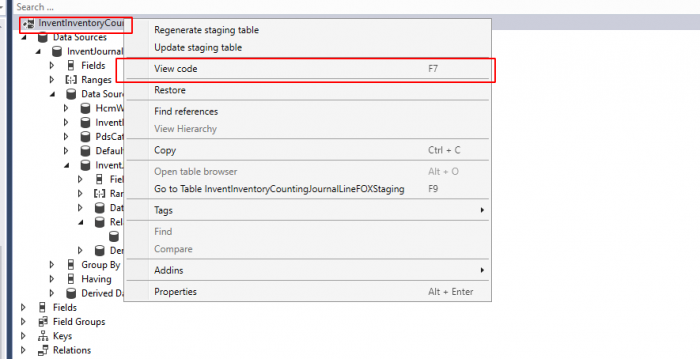
19) Put cursor on the entity object name and right click. Select “View code”. As we have renamed our entity, we have to rename references to the original entity name in the code as well. Select “View code” or press F7 to see the entity code.
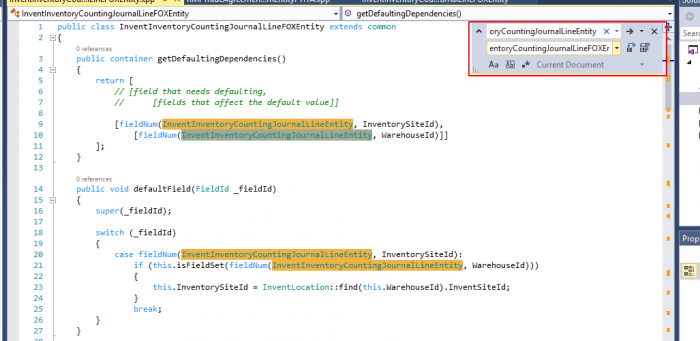
20) Press Ctr-H. The dialog in the screenshot appears. In the top dialog field insert the old entity name. In the bottom you insert the new name. Click on the “Replace Next (Alt-R)” or “Replace All (Alt- A)” icon. It’s recommendable to use “Replace next (Alt-R)” instead.
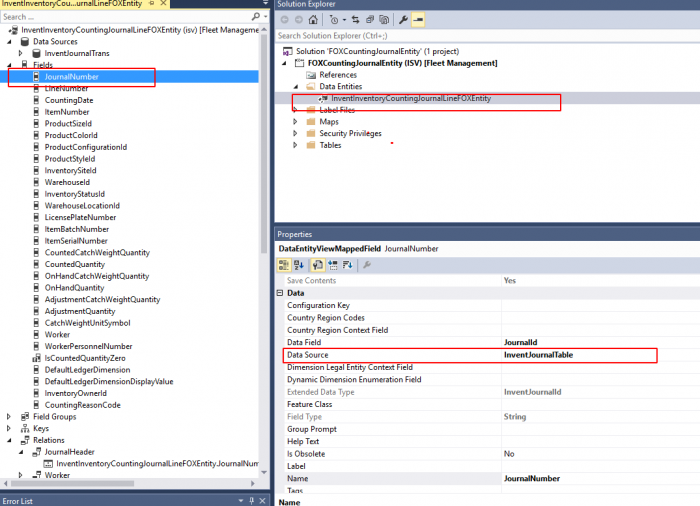
21) Go to the JournalNumber field of the entity and open it’s properties. Change the Datasource to InventJournalTable. This is important to do to avoid error “Data entity field X.Y is currently mapped to InventJournalTrans.JournalId but it should be mapped to InventJournalTable.JournalId because InventJournal.JournalId is a foreign key field referecing inventJournalTable.JournalId.
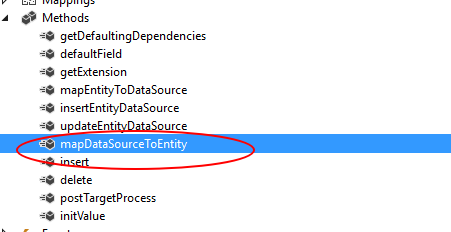
22) Following changes needs to be done in the entity method of InventInventoryCountingJournalLineFOXEntity. Open entity method MapEntityToDataSource.
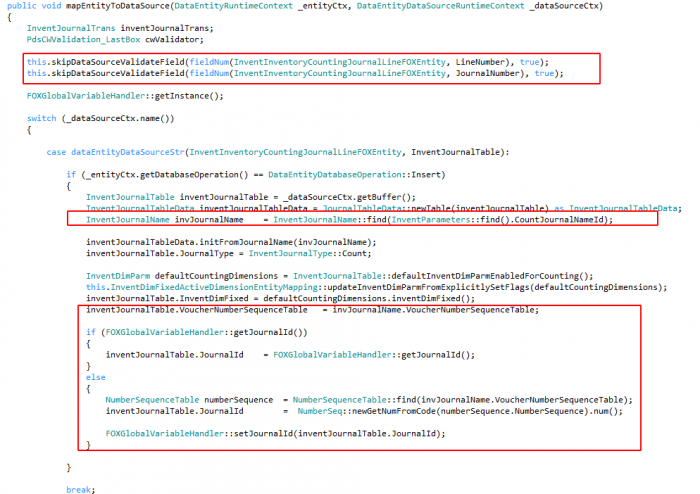
23) In the method mapEntityToDataSource we make the following changes in entity code as shown in screenshots below. we just add the logic for the inventJournal table in the switch statement. First we will add logic to handle logic for the InventJournalTable. Code is copied from the mapEntityToDataSource method of the InventInventoryCountingJournalHeaderEntity. In addition changes are made which are marked with the red boxes. First we would skip validation for JournaNumber and LineNumber (skipDataSourceValidateField) Second we assign a numbersequence for the counting journal. Third: we only would like that system create one journallId for all lines in the template and not one for each journal line. First screenshot is for data source entity InventJournalTable
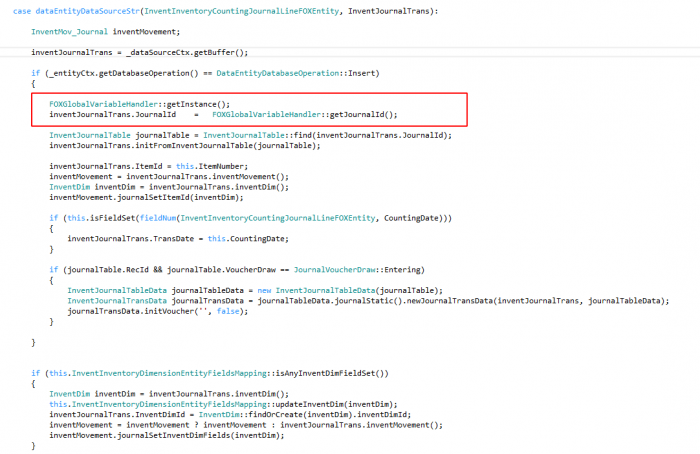
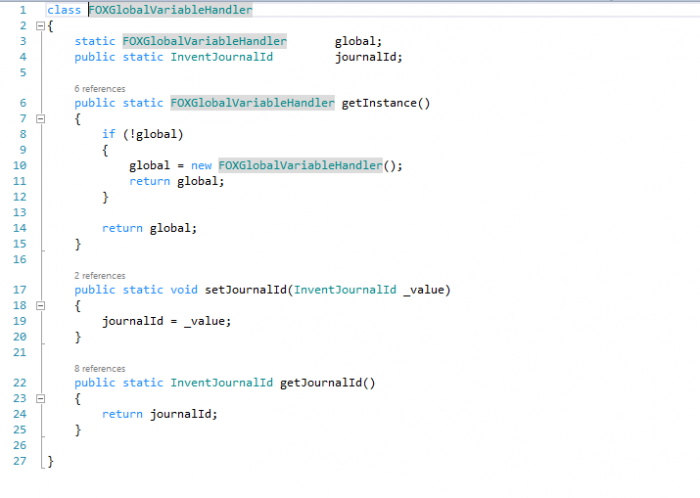
Following changes (in red box) are made for datasource entity InventJournalTrans. JournalId is generated one time and stored in a global class. Each journal line will receive the same journal Id.
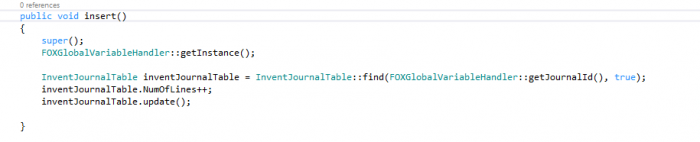
26) To support the LineCount function in journalheader, Entity insert method looks like this:
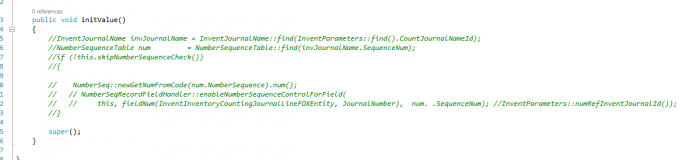
27) We also would like bypass the “Item x is locked for update in warehouse y because it is being counter error. See the logic for this in the entity insertEntityDataSource method
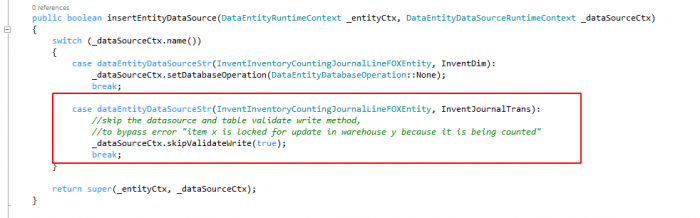
We are disabling the InitValue method, as assignment of number sequence is handled in the method mapEntityToDataSource
28) I have used global parameters. Here you can see how Class for storage of the used global parameters looks like this:
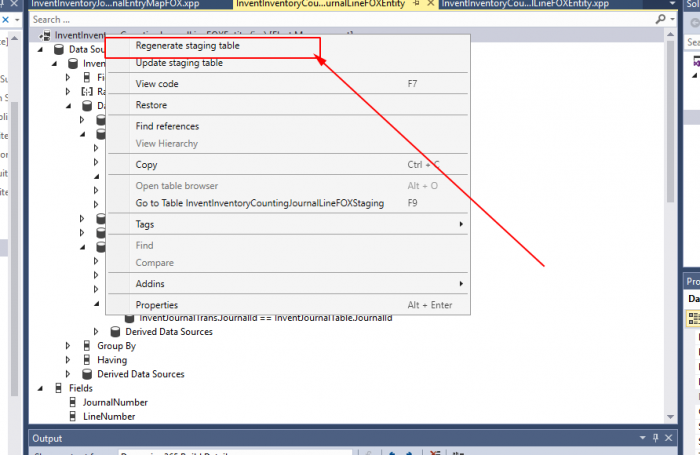
29) Because we change the entities Data Management Staging Table we have to Regenerate staging table. Go to the entity and do a right mouse click and select Regenerate staging table. Rebuild and synchronize solution afterwards.
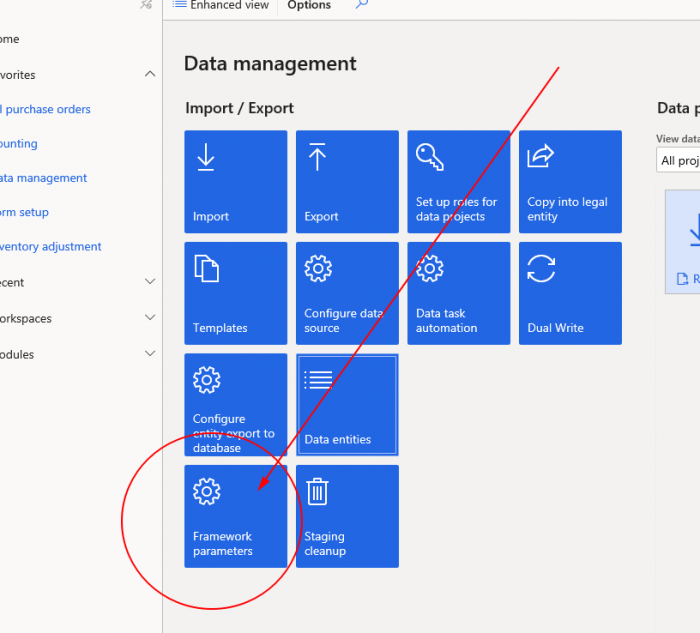
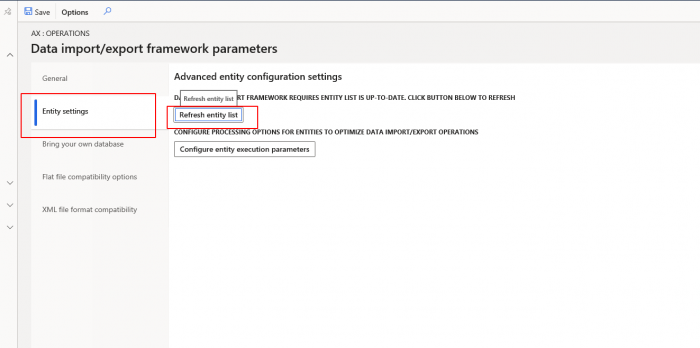
30) Next step is configure the new entity. In Dynamics 365 FO, Go to Workspaces | DataManagement | Framework parameters.
31) Select tab Entity settings and click button Refresh entity list confirm that you would like refresh entity list.
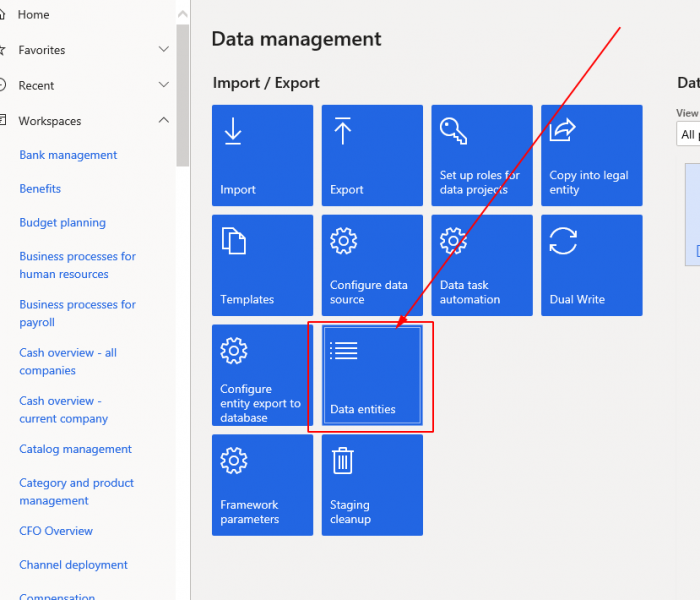
32) Now go back to Data management and select option Data entities.
33) Click the ‘new’ button:

34) search the entity or by table name or entity name:
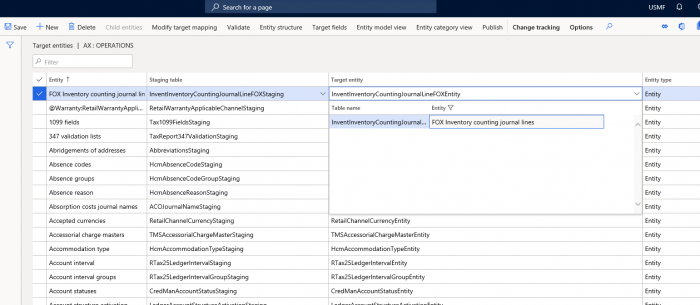
35) Click Save. Once configuration key is ticked, entity is ready for use.

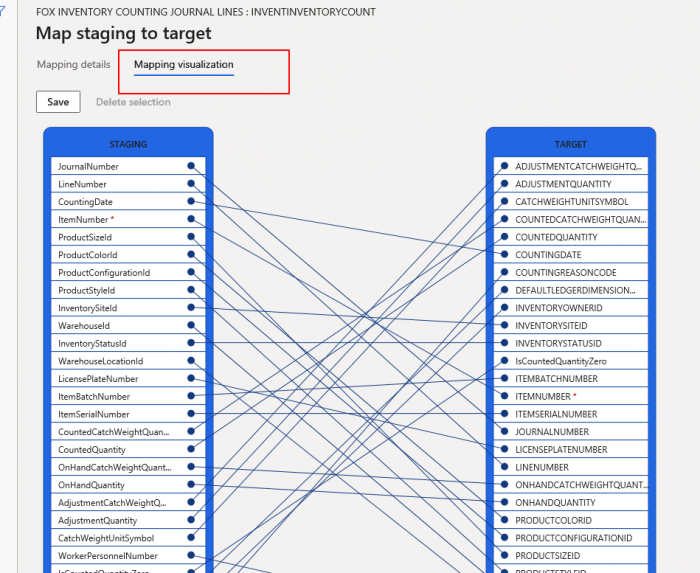
36) You can check the mapping by clicking button “Modify target mapping”

and mapping visualization. If mapping is correct entity is ready for use.
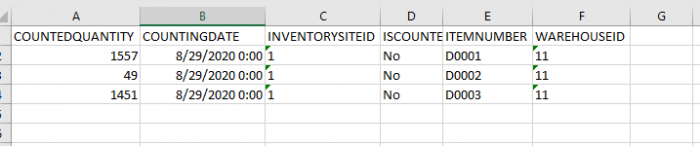
37) Below the (excel) template, with 3 records using for the import, which is used in this article. Each line should be available as a counting journal after import, in a counting journal.
38) Start import process: In Data management, click the Import button.

39) In the next screen (New Record) enter a Group name. Then to ‘+ add file’.
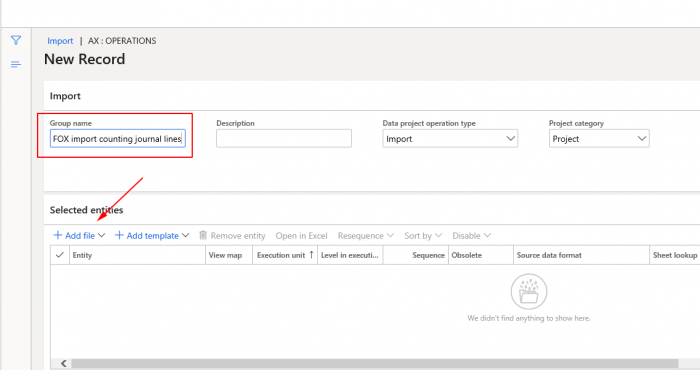
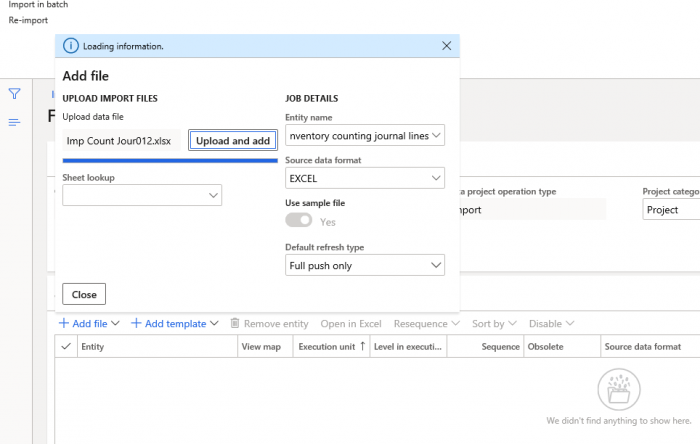
40) Enter Entity name and upload the file. Click close. We can see that record is created. Save it.
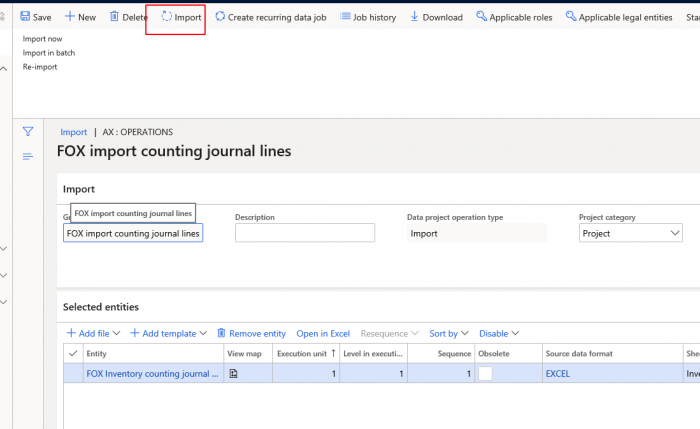
41) Click import.
42) Click refresh.
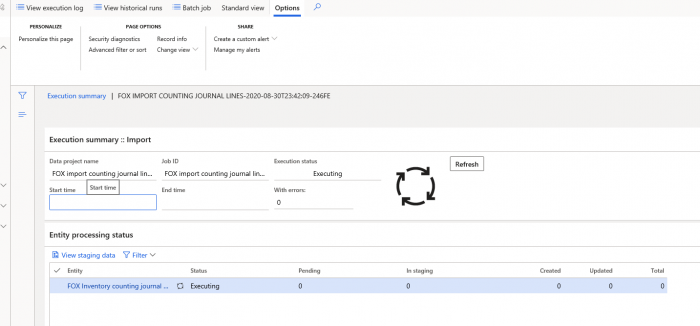
43) If import was successful, it looks like this:
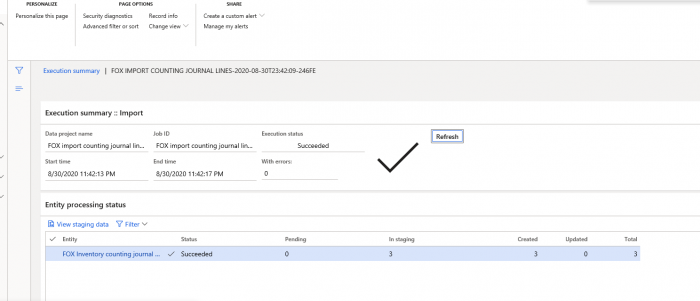
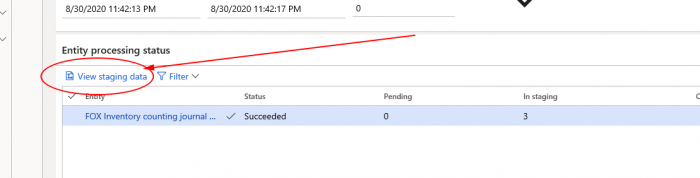
44) Click on button View staging data to see the records in the staging table.
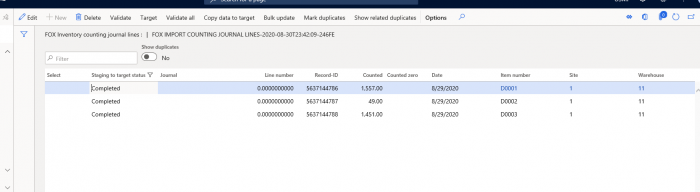
45) Staging data.
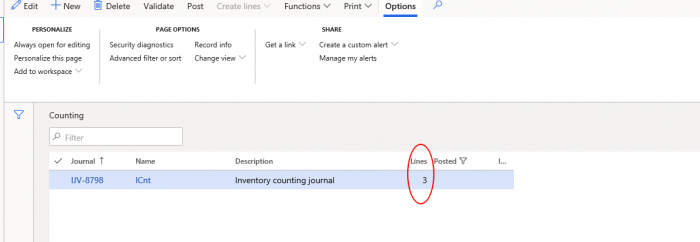
46) Counting journal header:
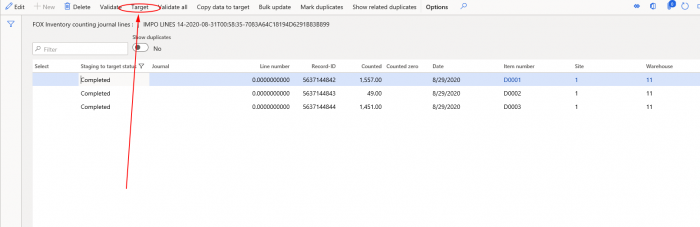
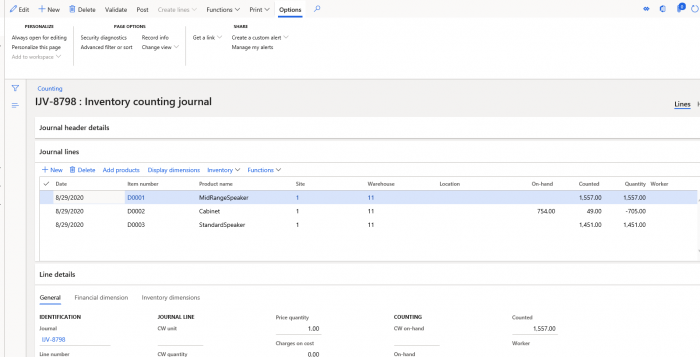
47) Counting journal lines:
48) Side effects: In the Staging table view form, the Target button, which makes it possible to navigate does not work. As soon I have found solution for it, I let yours know in a next post.