In this post I show the steps how to create a form with a “Selected/Available” section. This a typical form in Dynamics 365, which have 2 lists, an “Available” and a “Selected” section as shown in screenshot below. A new table is created to populate the “Selected” section, and with an Outer join with this table, these records will be excluded in the “Available” section, which I will explain how this is working.
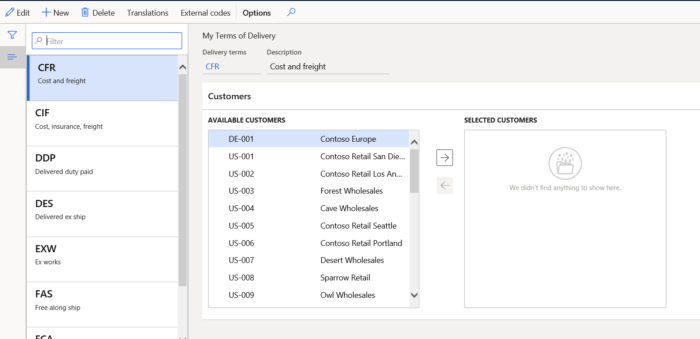
As example, I have duplicated the standard Delivery Term form (AOT name DeliveryTerms) and extend the duplicate with a Available /Selected section for customers. When completed, we can select and unselect customers for each delivery term, and we see that the customer is swapping for one to another box and visa versa, depending of the selected arrow button. These controls and it’s behavior are regulated in or the SysListPanelRelationTableCallback – or the SysListPanelRelationTable framework classes, and you cannot see them as control in the form itself.

The SysListPanelRelationTableCallback class is the framework class which I use for this example. There is also another class available the SysListPanelRelationTable class , which offers less features and won’t explain in this post.
In order to configure this feature in the form the following steps have to performed:
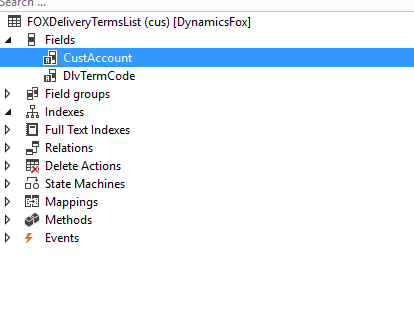
Step 1) Create new table. In our example drag en draw EDT’s CustAccount and DlvTermCode into the field section of the table.
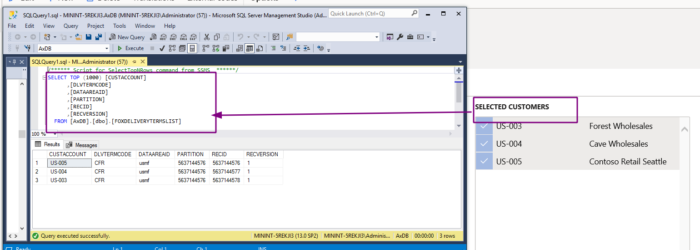
Each time when user is swapping record to the “Selection customers” section of the form, a new record will be added with the arrow-right button to this table. A record will be removed when user is swapping the record from the Selected customers” to the “Available customers” section. We can make an outer join into the “Available customers” section, to prevent that the same record is visible in both Available Customers and Selected Customers section, which I explain in the next step.
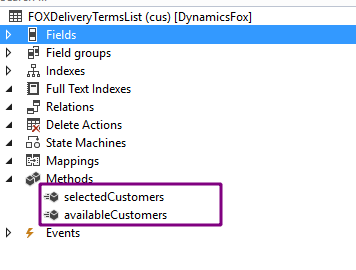
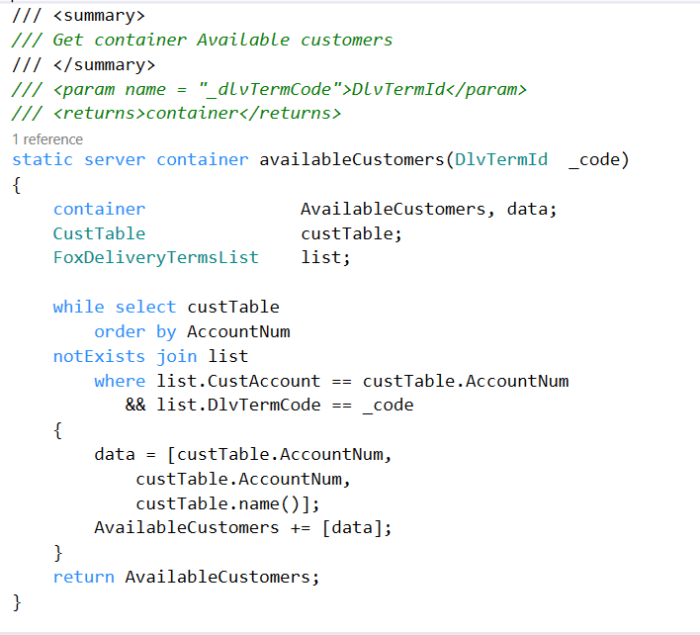
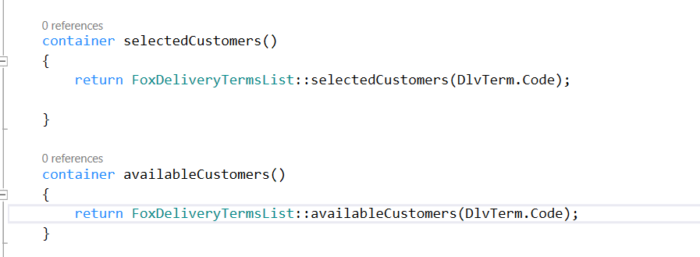
Step 2) Adding the methods selectedCustomers and availableCustomers to the table. Based on the delivery term Id, a data container is generated for both the selected customer and the available customer section, which should result in a correct display of selected and available records. Both methods will be used as one of the parameters for the SysListPanelRelationTable framework class.
logic for selectedCustomers method:

Logic for the availableCustomers method:
In the form the following changes are needed:
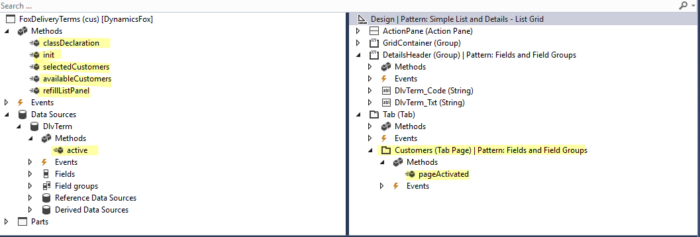
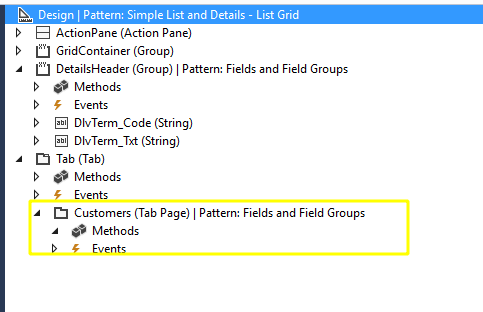
Step 3) Add new tab control “Customers” in the form Design (see screenshot).We have to select a place in the form where we place the the elements from the SysListPanelRelationTableCallback are placed. We will place it under this tab page Customers.
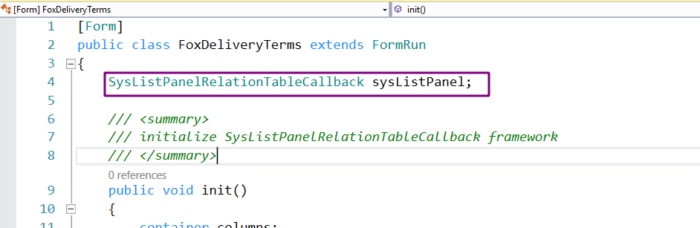
Step 4) Declaration of the SysListPanelRelationTableCallback in the class declaration section of the form
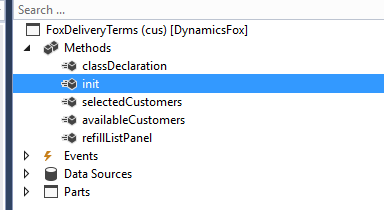
Step 5) Add the following method to the form. These methods makes a call to the methods created in step 2). Via the given parameter in the SysListPanelRelationTableCallback class they will be read out, and used to fill the selectedCustomer/ AvailableCustomer.
Step 6) Add an new instance of the SysListPanelRelationTableCallback to init method of the form
Add the following code to the init:
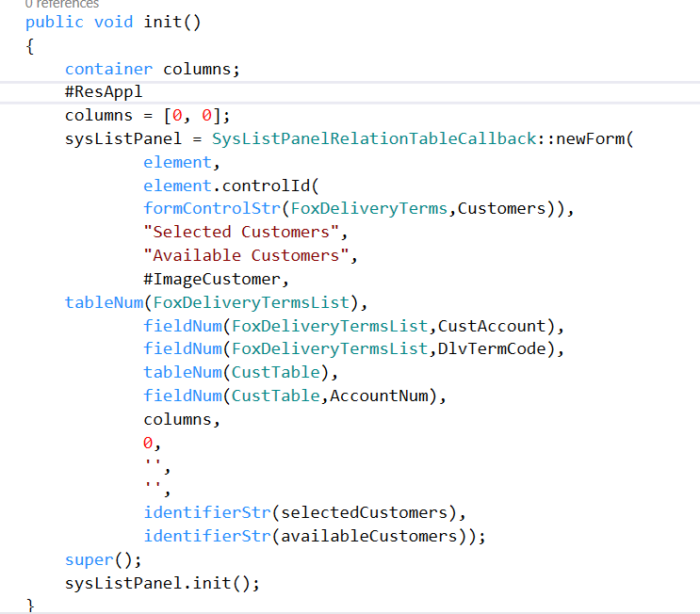
Meaning of the parameters:
1. FormRun,
2. ParentId, is the controlId in the form to place framework controls
3. Caption for “Selected Customers” control,
4. Caption for “Available Customers” control,
5. ImageId,
6. TableId relationTable, in our example the name of the table name for the “Selected Customers”/ FOXDeliveryTermsList
7. fieldId relationField,in our example the first field for the table used for “Selected Customers” tab, (FOXDeliveryTermsList.CustAccount)
8. fieldId relationRangeField, in our example the second field for the table used for “Selected Customers” tab (FOXDeliveryTermsList.DLVTermCode)
9. TableId dataTable, What is the table which data we use? In our example CustTable.
10. Key field of of the table which we use for display CustTable.CustAccount,
11. Container dataContainerFieldIds, = empty
12. FieldId dataRangeField = 0,
13. AnyType dataRangeValue = ”,
14. Identifiername validateMethod = ”,
15. identifiername selectedMethod = ‘selectedCustomers’,
16. identifiername availableMethod = ‘availableCustomers’,
17. int itemsNeeded = 0
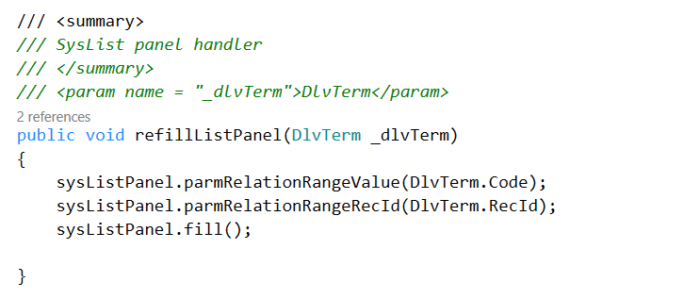
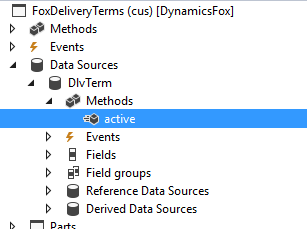
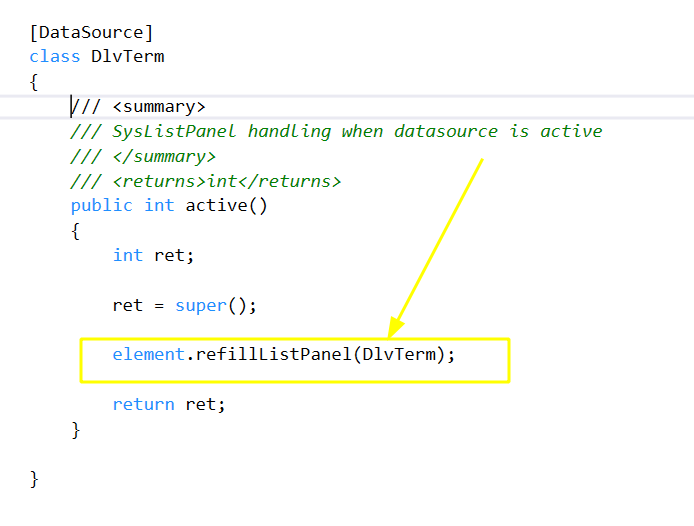
Step 7) Add (re)fill method for the SysListPanelRelationTableCallback, so that framework class could be updated correctly, when user navigates the form. We have to call this method when the form datasource and the “Customers” tab is activated by the user (Step 8 and 9)

Step 8) call to refill method via the data source active method:
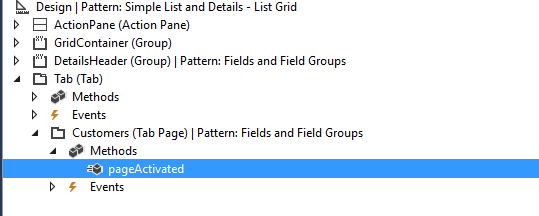
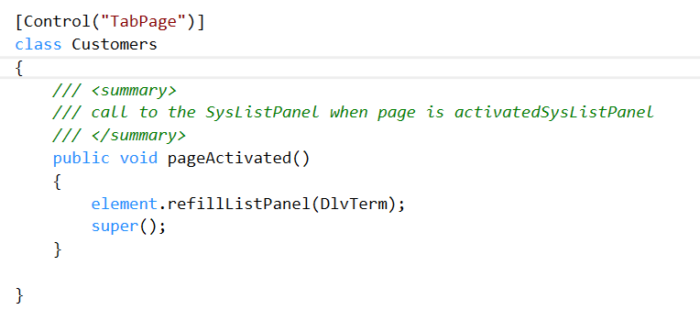
Step 9) call to the refill method on the TabPage “Customers” via override of the “PageActivated” method:
Step 10) Build and synchronize your solution. When done, the form is ready for use.