This post describes the steps to generate your own Azure Devbox in LCS. You should have a Visual Studio Professional Subscription or Visual Studio Enterprise Subscription, before you can configure your own Dynamics 365 FO Contoso Azure Devbox.
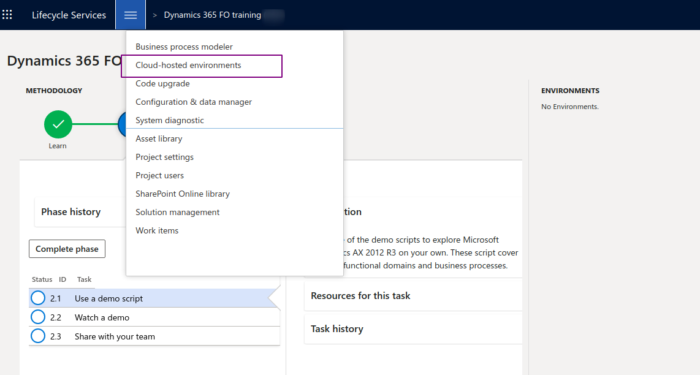
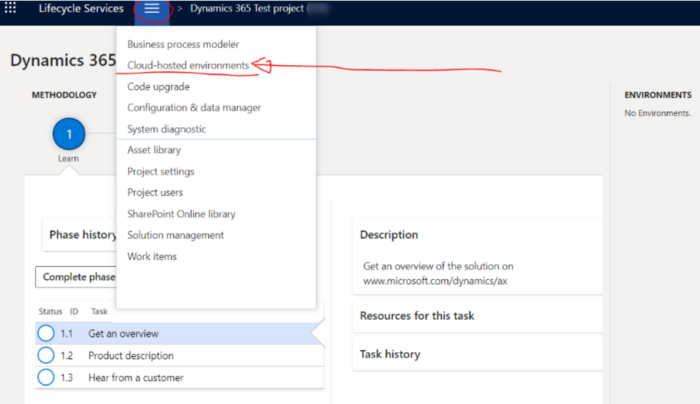
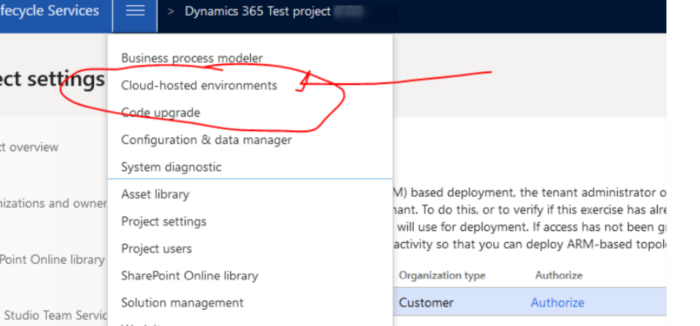
The new environment will be generated in the main menu of the project, under the option Cloud Hosted Environments. We can navigate to this environment in the main screen of the LCS project, via the “Hamburger” icon (the three stripes), at the left top section of the screen.

Screenshot for illustration, location in LCS where we create the new environment:
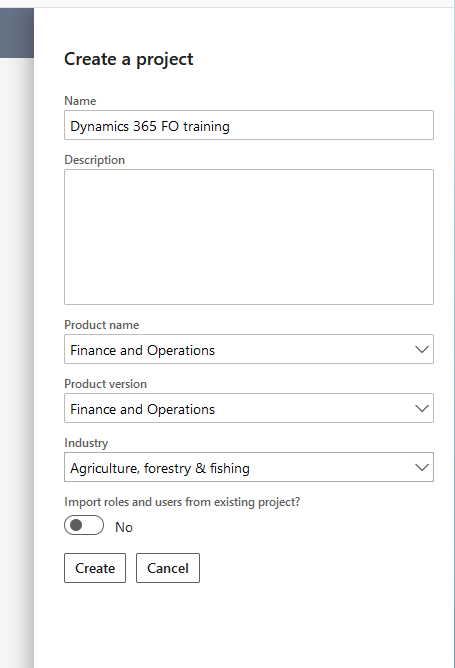
You should select a project which you can use to configure the new cloud hosted environment, or you need to create, in the LCS main menu, a new project with product version “Finance and Operations” as shown in screenshot below:
When LCS project is selected, or new project is created, go to the Azure portal at www.portal.azure.com. Login with your credentials. Following steps needs to be done:
Part 1) Azure: Set the contributor workflow
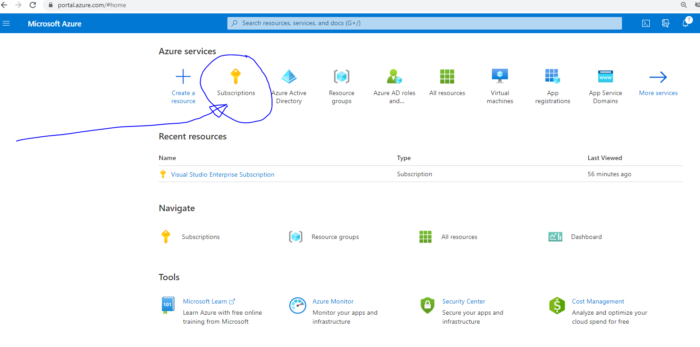
- Login Azure with your own credentials. You will see the Azure main menu.
- In the Azure main menu, click the “Subscription” icon.
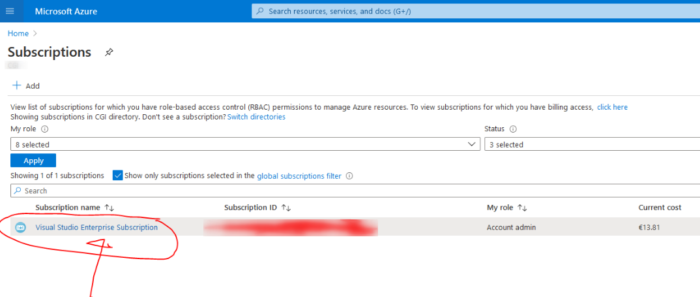
3. Now we enter following screen. From this screen we need to remember the subscription ID (e.g. save it in a temporary notepad file) as we need it during the LCS configuration process see part 2, configuration in LCS.
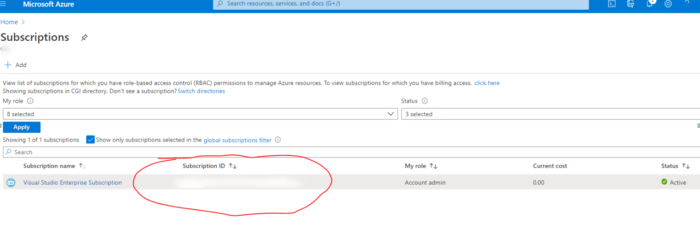
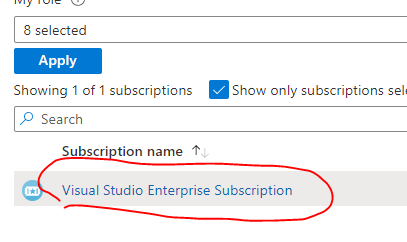
4. The first column is Subscription name. Click the Subscription name, in our example the subscription name is Visual Studio Enterprise Subscription:
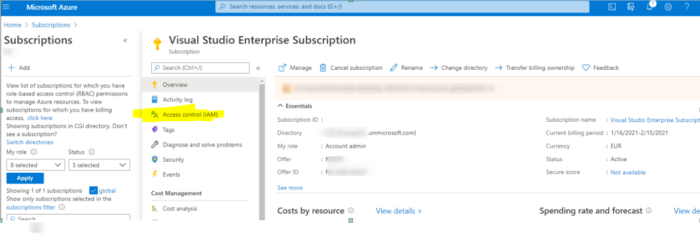
5. Next screen appears. Select option Click Access control (IAM)
6. Click “Add” Dialog opens and select option option “Add role assignment”.
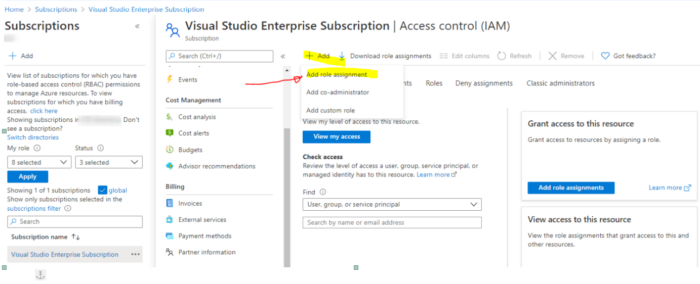
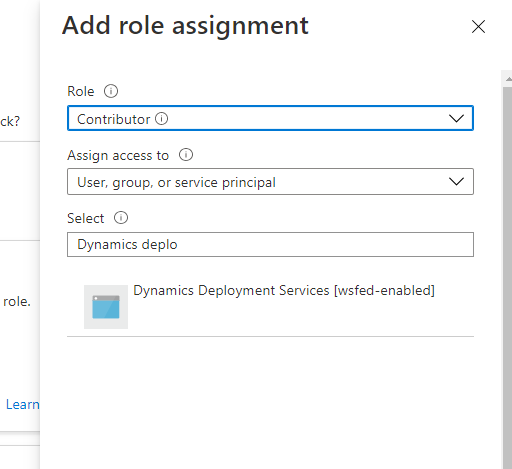
7. The “Add role assignment“ dialog box appears. Add the following info:
For “Role” -> Select “Contributor”
For “Assign access to” -> Select “User, group or service principal”
For “Select” -> Select “Dynamics Deployment Services [wsfed-enabled]”
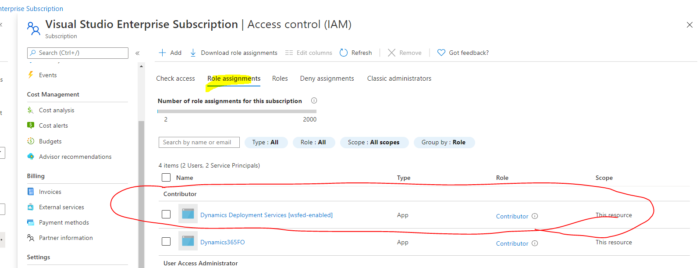
8. In “Role assignments” we can see that a new role Dynamics Deployment Services [wsfed-enabled] is added.
Part 2) Configuration in LCS (www.lcsDynamics.com)
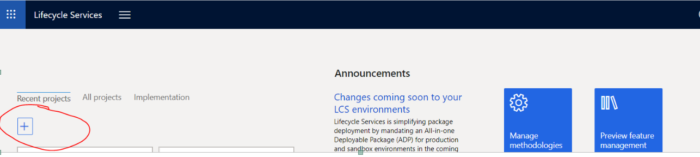
In this example I will create a new project for hosting the Azure D365 FO devbox to be created. If you already have existing project go to step 4).
- In the LCS main menu create a new project, by clicking the “+” icon.
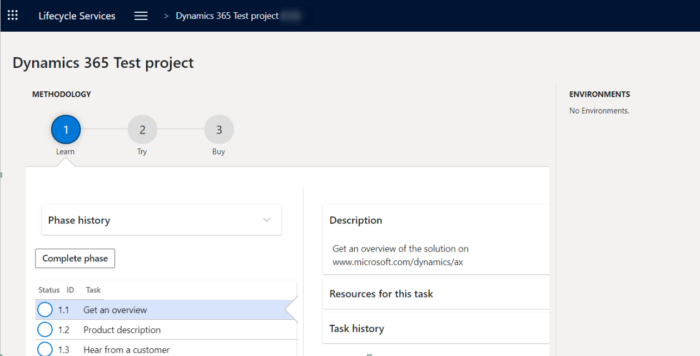
2. Fill in the project details (Product version is Finance and Operations) and click “create”.

3. Now the project is created, and we enter the main menu of the project. Watch the three stripes or Hamburger icon. Here we can see the main functions.
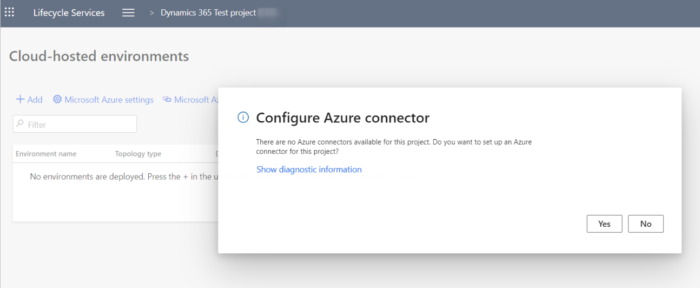
4. Via the Hamburger icon we can navigate to the “Cloud-hosted environments”.
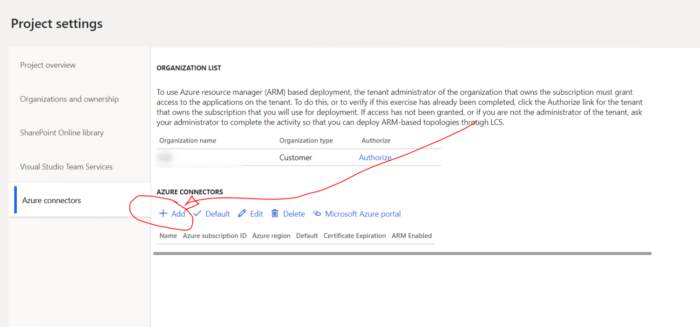
5. Now system ask to configure the Azure connector. Select “Yes”.LCS will now guide you to the tab Azure connectors which is a fast tab under Project connectors.
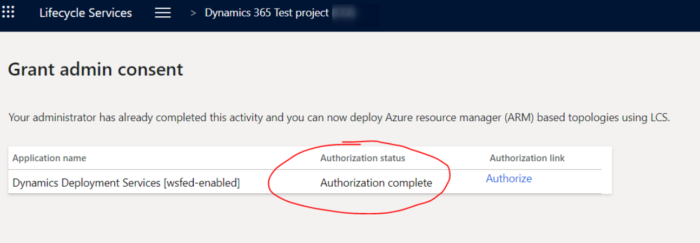
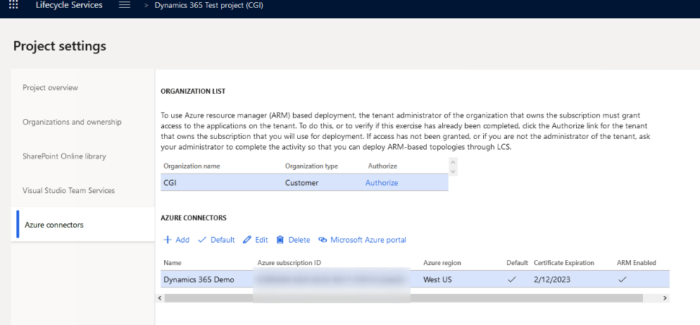
6. In the section “Organization List” of the screen, we will check if “Authorize” is enabled, click the “Authorize” link:
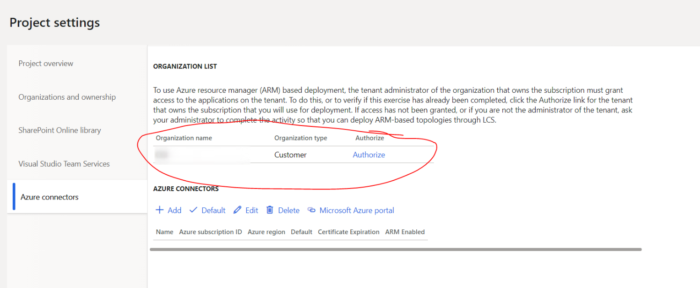
When the Authorization status is “Authorization complete”, Authorization is OK, and we can continue the configuration process.
7. Now we add a new Azure connector. Under section “Azure Connectors” Click the “+ Add” icon:
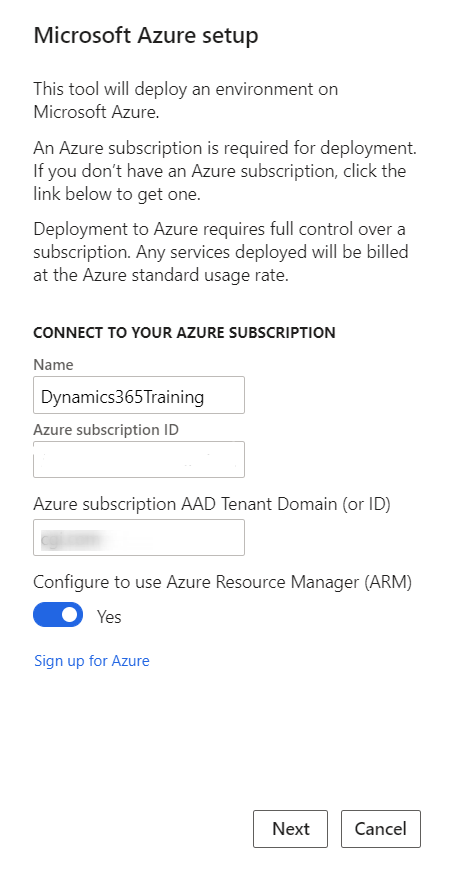
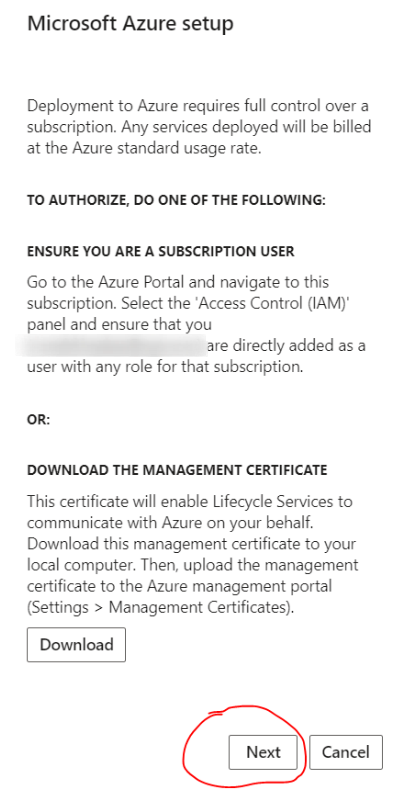
8. Now system guide us to a wizard, the The Microsoft Azure setup dialog: In this menu, we have to enter the following parameters so that LCS can make a connection with the Azure subscription:
Name: You can enter any name of your choice, but it should be a unique name
Azure subscription ID: You can find Subscription ID under Subscribtions in the Azure portal. see part 1) sub 3)
Azure subscription AAD Tenant Domain (or ID): automatically filled in
Configure to use Azure Resource Manager (ARM): tick “Yes”
Click Next to continue.
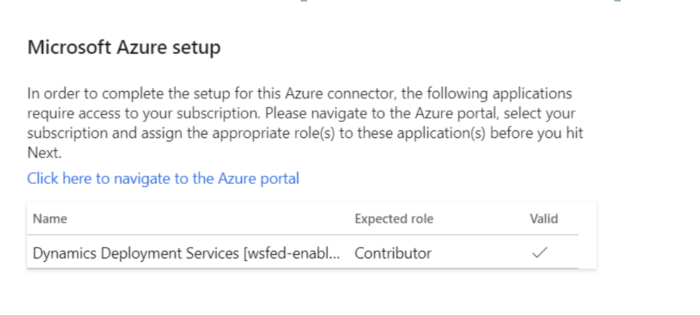
9. Click next again (Btw In this screen we see the role we added at Part 1) sub 6 Add role assignment”).
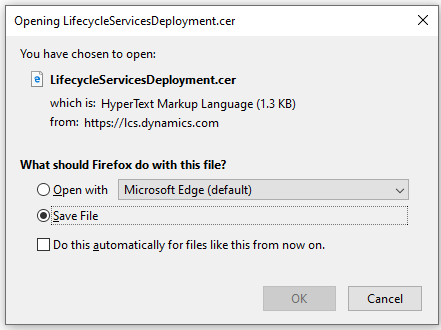
10. In the next screen we have to download the Management certificate. This certificate need to be uploaded in Azure portal. In the next steps, I will explain how to do this.
Click the “Download” button
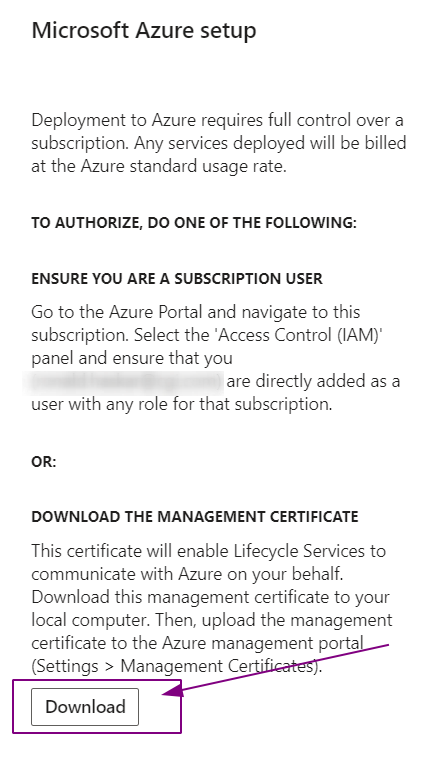
11. And save it on a local map on your PC.
12. In order to upload the management certificate, we need login to the Azure portal (www.azure.com). Navigate to the “Subscriptions” section.

13. In the Subscription menu click open the Subscription by clicking the Subscription name: “Visual Studio Enterprise Subscription”
At the left row we see the option “Management certificates”.
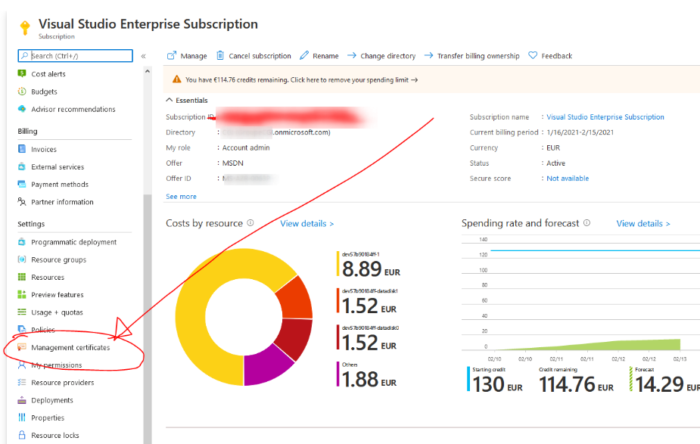
Now we can upload the management certificate.

14. Now we can upload the management certificate. When finished we continue the configuration process in LCS. In LCS we are ready with teh management certificate download and to leave the “Management Certificate Download” screen we click “Next”.
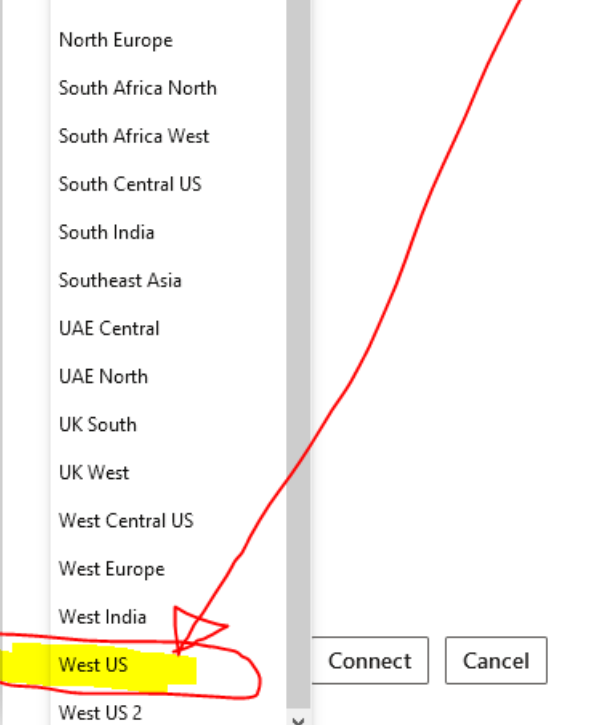
15. In the next screen we need to select the Azure region. We select more regions, but depending of limits of your subscription, it could be that they are not working, even if a particular region is more close to your actual location. A safe choice is egion West US. Click the “Connect” button to confirm your choice.
16. Now we see that LCS create a new Azure connector record. We are ready with the configuration of the Azure connector.
Now we can continue to the next step, to configure the Dynamics 365 F&O Azure devbox.
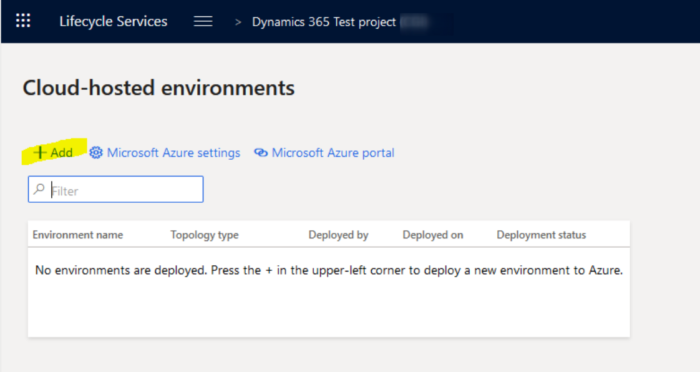
Go to the LCS project main page, and that the Hamburger icon is visible. Click the Hamburger icon, and select Cloud-hosted environments.
17. In the Cloud-hosted environments select click the ‘+ Add’ button.
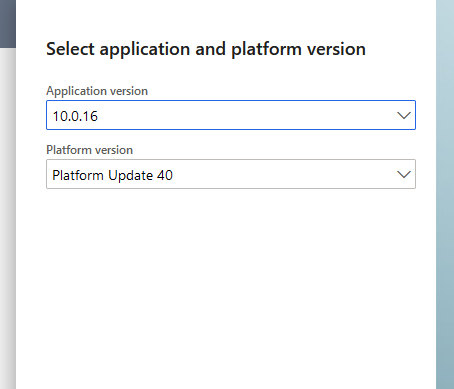
18. In the next screen, system is coming with the suggested Application and Platform version. Accept default values. Click “next” to continue.
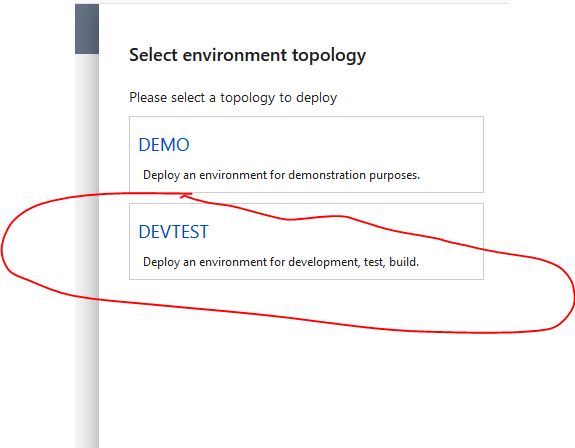
19. In the next screen select option DEVTEST
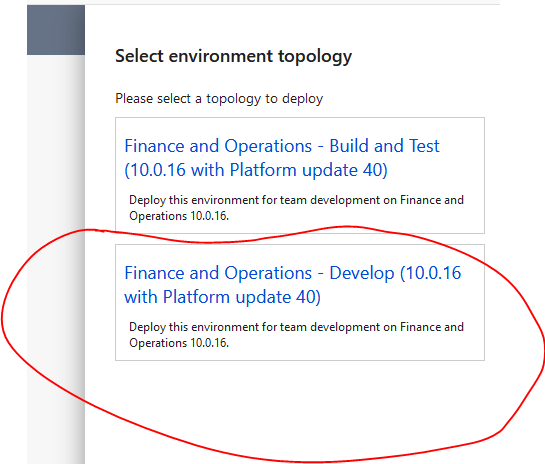
20. In “Select environment topology” select “Finance and operations – Develop” (selected Application + Platform version)
21. In the next screen, we can configure settings and parameters for the new Azure Dynamics 365 FO Devbox like Size and number of cores plus Advanced settings. Be aware that these parameters influence the monthly subscription fee. In our example we choose the most economical option and therefore we select Instances 1 and Size D12 and skip the “Advanced settings”.
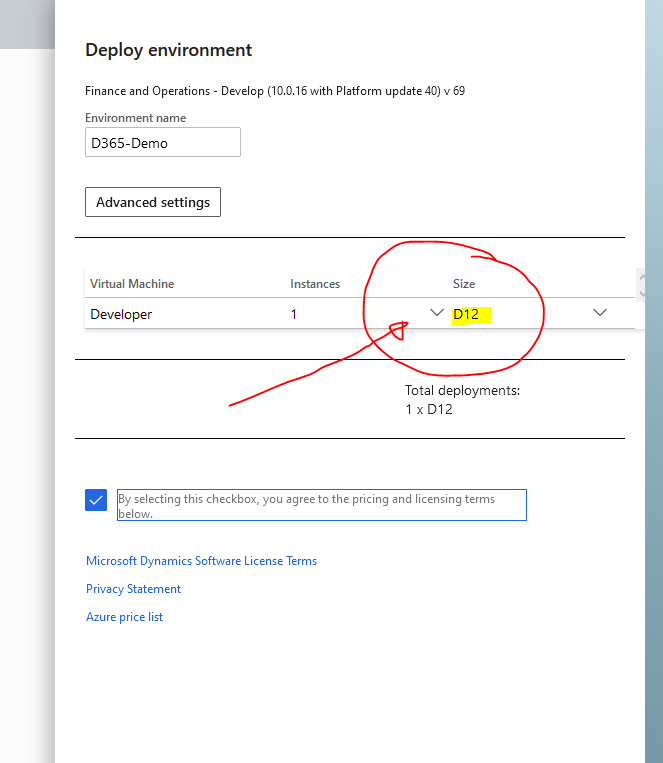
Click the Done button. Now the configuration of the Devbox will start. Usually this process takes a few hours. When finished, the Devbox is ready for use.
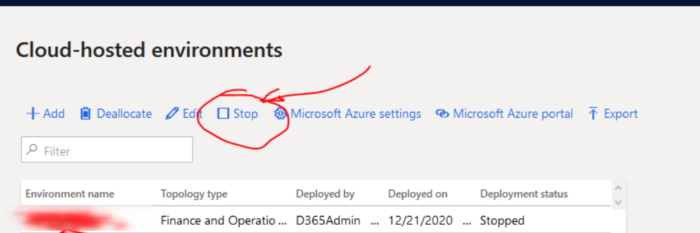
TIP: To reduce the cost of subscription of your Dynamics 365 FO Devbox, In Cloud-hosted environments, when we not use the machine, we can stop it (by clicking the Stop button). When the Deployment status of the machine is stopped, Microsoft will not charge subscription fee.